Feb 172012
 
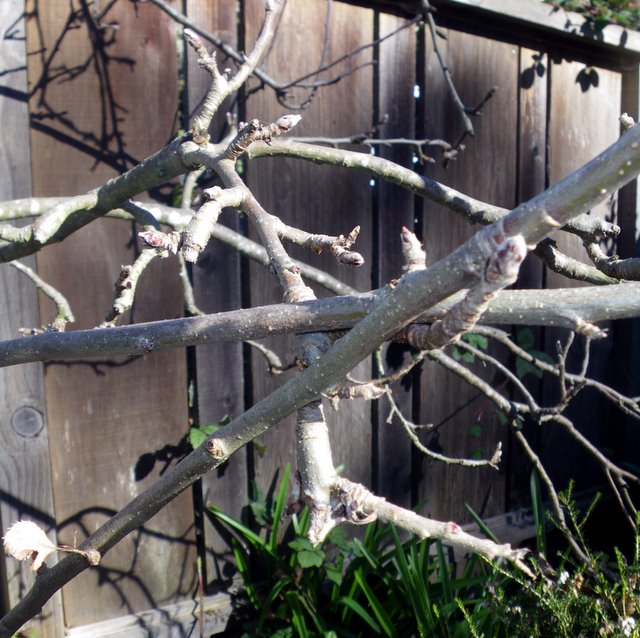
Prune out the crossing branches


by Robert Kourik – Guest blogger extraordinaire.  Robert is an expert on all things in the edible landscape. Here is an important tip on fruit tree pruning.

Fruit trees don’t need to be pruned to make fruit. But pruning will:

1. Help keep the fruit within reach.

2. Provide stronger limbs and branches that can carry the load of an abundant crop.

3. Allow more light into the middle of the tree to support fruiting lower in the canopy (foliage).

4. Cause branching for more  places to produce fruit.

5. Shape the tree into a more natural fruiting form.


Fruit tree pruning angle

Best angle for pruning a fruit tree is around 60 deg

Tree “shaping” is as important as pruning. As a general guideline, the best position for a shoot to naturally favor some lateral shoot growth and some flower buds is between 60o and 45o from horizontal. Flowering and branching are encouraged and a reasonable amount of tip growth remains so the plant doesn’t grow too narrow or spindly.


Pruning or shaping new growth to this ideal zone of position will promote:

  • More laterals without extra pruning.
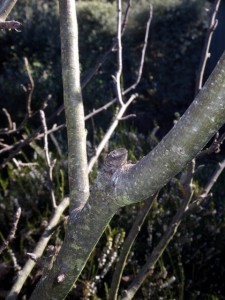
  • Form a wider angle of attachment of the younger lateral to the trunk or primary  scaffold, which is also good for fruit trees because it lets more light into the interior of the canopy for better fruit color and flavor. (Use speader sticks like in the photo to widen the angle. This can be done in the late winter or early spring.)
  • More flower buds for greater ornamental beauty and, with food crops, more to harvest.

Be sure to use sharp and sturdy pruners to make your cuts. It will make the work easier and allow the cuts to heal faster.

You can read more about fruit trees and everything else you might want to plant in the edible landscape in Robert Kourik’s book. Designing and Maintaining your Edible Landscape Naturally, at his website: www.robertkourik.com

Feb 152012


by Avis Licht

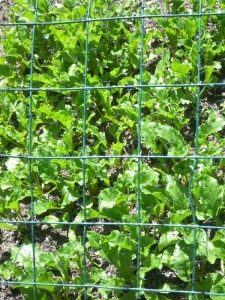
Wire fencing covered with bird netting

To completely protect plants, cover with bird netting


We love the birds in our garden, but we don’t love how they eat the young seedlings. Here is the best way I’ve found to keep the little rascals from wrecking your garden.

1. Plant the seedlings, like lettuce, beets or broccoli in a raised bed. When you plant intensively in a bed it is easier to protect more plants than if they are in single rows.

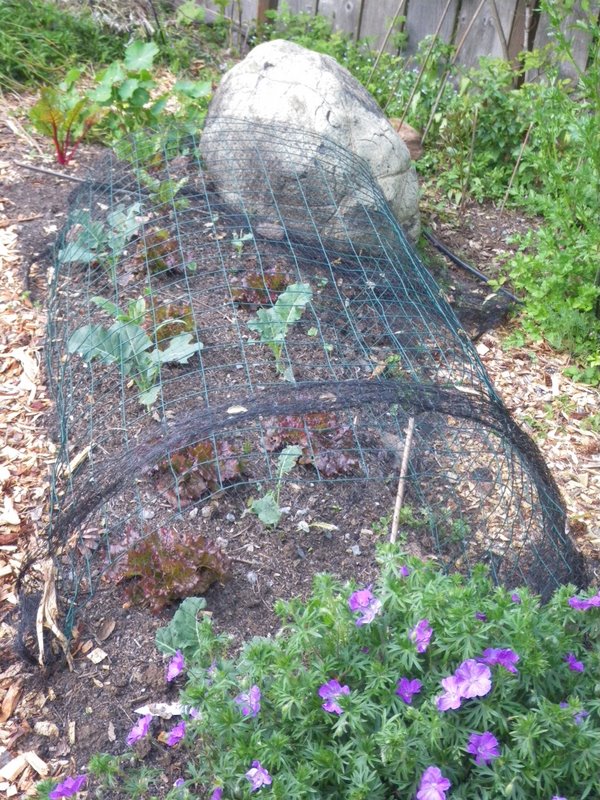
2. Place wire  fencing over the bed in a hoop like fashion.  You can also use heavy gauge wire, flexible plastic tubing or bender board.


Hoop shape over bed with netting

Keep your netting off the plants to allow room for growing

3. Pin the edges down with wire staples that are used for holding down irrigation tubing.

4. Lay bird netting over the wire. Pin it down carefully along the edge of the bed.  If you leave any openings the birds will sneak in.

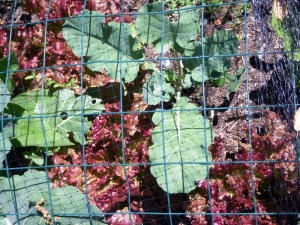
Seedlings under protection


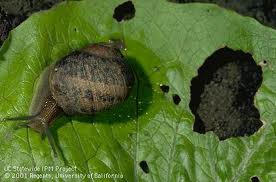
One little thing. You need to be sure that it’s birds eating your seedlings and not some other pests, like snails or slugs. Bird netting will NOT keep the snails out. A bird will bite the plant and leave a v shaped mark like this > .  Snails and slugs eat both the edges and the middle of the leaf in curves.

snail damage to leaf

Snails and slugs will chew the edges and center of a leaf


Feb 132012


by Robert Kourik, guest blogger extraordinaire!

Windbreaks add beauty as well as function to your landscape

You can control the wind to keep your house warmer in the winter by blocking the chilling effects of the wind or to cool your yard or house in the summer by scooping the prevailing breezes toward the house. The most common way to sculpt invisible air currents is to use a windbreak of trees.

Ideally, the windbreak’s height should be one-fifth to one-fifteenth the distance to be protected. An 8-foot hedge can provide a measure of protection up to 80 feet downwind.

Windbreaks work best when their length is perpendicular to the prevailing winds. One row of the right tree is much more effective than a wide, multi-row planting.

Allowing some air to pass through a windbreak reduces the wind’s speed over the greatest distance. With a permeable windbreak, some of the wind can slip through to form layers of air. This blanket of layered air helps to keep the blustery winds aloft after passing over the top of the windbreak. The most effective windbreaks are actually 50 percent permeable.

Other important considerations for windbreak designs include the following:

• Be sure to talk to a local nurseryman about the best windbreak trees for your soil and climate.

• Don’t leave any large gap in the windbreak, such as a driveway, as the wind will be funneled through the opening at a speed up to 20 percent greater than its normal velocity.

• Make sure the windbreak is far enough from the house that it won’t cast a shadow on south-facing windows during the winter.

Robert Kourik is an author and gardener.  He wrote THE most informative book on edible landscaping over 30 years ago. Designing and Maintaining Your Edible Landscape – Naturally is available from his website: www.robertkourik.com. He has other books on irrigation, roots and soil that you don’t want to miss.  He’s funny, smart and will help you get the most out of your edible landscape. Whenever I have a question about a plant in my garden, I head to Robert’s book first.

Windbreaks are important for your own comfort as well as your plants

The windy coast can be tamed by a well grown hedge.

Feb 082012
 
New plantings in the spring garden


by Avis Licht  –

New plantings in the spring garden

Pots near the kitchen are great for herbs


Early Spring is the time for gardeners to get ready for their early vegetable garden.Here are a few things to think about to help you get started.

SITE

1. Pick a place near the house for your vegetable garden so that you will see it everyday. Out of site is out mind for most people. Visit your garden for at least 10 minutes a day and you will keep up with the maintenance and see how plants are doing.  You’ll discover if there are any problems before it’s too late.

2. Pick a sunny site that gets at least 6 hours of sun. Most vegetables need this amount to grow well.

3. Make sure there’s water near by for irrigating.

SIZE

Raised bed gardening

Easy to reach, easy to plant, easy harvest, it's a raised bed

1. Keep it Small and Simple, as the saying goes. First time gardeners should start small and be successful.  Graduate to a larger plot next year. A couple of beds, 3 ft x 6 ft, will give plenty of delicious vegetables.

2. Consider growing your herbs in pots near the kitchen where they are easy to harvest.

SOIL

1.Whatever kind of soil you  have, be sure to loosen it and add compost. By aerating your soil and adding humus you will increase oxygen, nutrients and drainage, which will help your plants grow. You can loosen your soil by digging, rototilling or bringing in topsoil and adding it to a raised bed.

2. Check your soil for drainage. If you see standing water on the surface, or if you dig a hole and there is water in the bottom, you need to make some adjustments. Vegetables don’t like to grow in standing water.  There are several ways to improve drainage.  Dig into the hard soil with a digging fork and loosen it. Raised beds provide better drainage. You can also dig a small ditch and direct it away from the growing area. This will help move water away and improve your soil.

3. Create paths for walking in the garden.  Every time you walk on the soil you compact it. This prevents air and water from entering. Just by using paths and not walking on the beds you will increase the health of your soil and your plants.

CHOOSE YOUR VEGETABLES WISELY

Choose your plants wisely

Early spring you can sow and plant broccoli, cabbage, cauliflower

1. Choose your favorite foods to grow. Zucchinis are easy to grow, but if you don’t like them, don’t grow them! Peas, carrots, beans and tomatoes taste better when harvested ripe and fresh. They are easy to grow and harvest.

2. Choose what grows best in your climate and your site. If you’re in the cool Northwest  U.S. you might want to pass up on the hot peppers and melons.  Cooler climates are good for broccoli, cabbage, lettuce, spinach, chard and kale. If you’re in a hot climate go for the peppers, melons, squash and eggplant.

3. Look for micro climates in your garden to give you more opportunities to grow plants that you might otherwise leave out. A micro climate will be a place that is sunnier ( on the south side of the house), cooler (on the north side), calmer (on the lea side of a fence or windbreak), shadier (under a tree) and so on. Check out your garden for mini climates.

RESOURCES

1.Your local nurseries will be carrying plants appropriate for your climate.  Ask them questions.

2. For the Western United States, consult Sunset Western Gardening Book.  It is amazing in it’s information for so many regions in the West.

3. Seed Catalogs and Online companies. Check out my list in the resource page.

Raised beds

Double dug beds are raised and need no edging


Jan 302012
 
Mint in the garden

by Avis Licht

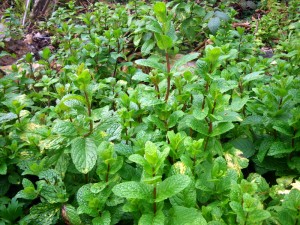
Mint in the garden

Mint is wonderful, but don't let it escape into the rest of the garden


Mints are quite possibly the easiest, most useful and most annoying herb in the garden. They are tough, unfussy, grow almost anywhere, are incredibly good for your health, can be used in drinks, cooking, insect repellant, digestive aid and more. And they will spread like the dickens in your garden.

PERENNIAL 

Mint is a perennial and will die back in the winter in cold climates. In mild climates you can expect to harvest it all year long.  To have mint in the winter, put it in a pot (you probably want to do this anyway to keep it from spreading) and put it in a protected spot.

VARIETIES

You can find all kinds of mint flavors without resorting to artificial color and flavorings. Imagine – chocolate mint!(M. x piperita “Mitcham”) It tastes like a peppermint patty. Orange ( M. x piperita citrata) or bergamot mint has a slightly orange flavor. Apple mint, pineapple mint, and golden apple mint are all easy to grow. Pennyroyal (M. pelugium) is a small creeping mint that has a very strong flavor and is used  to keep fleas and insects away. Peppermint (M. piperita) and spearmint  (M. spicata)are the most commonly used mints for teas. By growing your own mint you can match the mints with your own preferences. These are just a few of the mints. Go wild!

SOIL

Almost any soil will grow mint, but it prefers a rich, moist soil.  Amend with compost. If you plant it in the ground, consider putting it in a pot or bucket to keep it from spreading. A root barrier around the plants also helps to keep them in check.

PROPAGATION

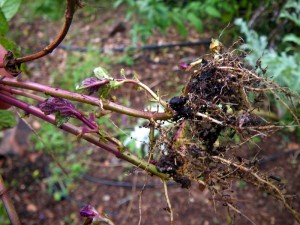
The easiest way to propagate mint is to dig up some from the garden and divide it into as many pieces as you want plants. In this photo, I literally ripped it out of the ground.  It has roots and can be plopped into a pot or a safe place in the garden.

Roots of a mint plant

Pull them out of the ground and replant , as simple as one - two

HARVEST

Clip off the the tender new growth. Use it fresh, as mint loses much of its flavor and healthful qualities when dried. If your plants get old and woody, just cut them back to the ground and they’ll send up fresh new shoots.

Never say you weren’t warned!

MINT IN THE LANDSCAPE

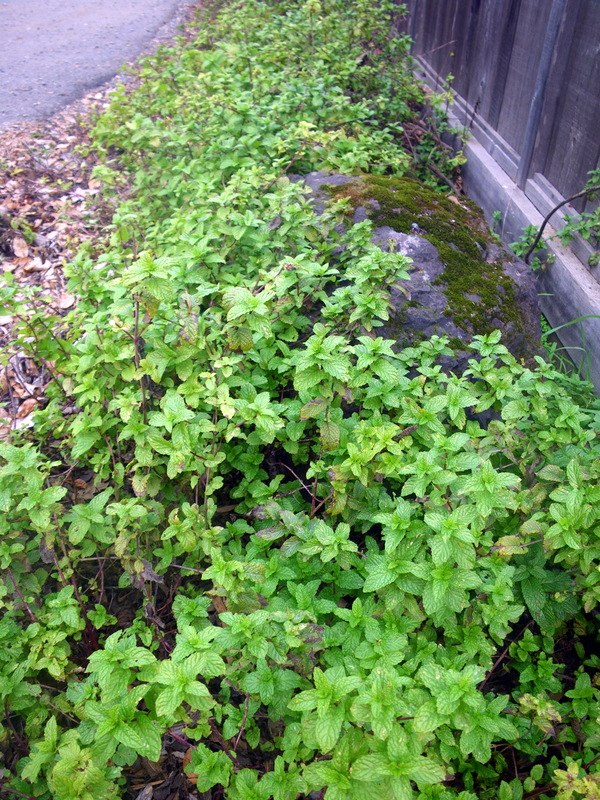
I’ve let this mint grow as the edging to my garden fence.  Cars regularly run over it, but it doesn’t seem to care.  I only use the mint inside the garden for my edible use. Roadside herbs are not the best for eating. But it sure smells good when you step on it.

Mint along the road

Mint as an edging in the edible landscape


Jan 262012
 
Strawberry

by Avis Licht

Strawberry

Who can resist a ripe strawberry?

I recently wrote about fruits that you can grow in small yards. At the top of the list was strawberries. Here are some easy tips to get the best fruit from your plants.

There are many varieties of strawberries. June bearing produce one large crop a year in late spring or early summer. Pick the varieties best suited to your climate. Everbearing strawberries have smaller crops in early summer and fall. Day neutral bear intermittently through the summer.  Since you’re planting for your own use I think it’s best to have several varieties that bear throughout the whole growing season.

CLIMATE

You can find a strawberry for almost any climate. In very hot areas they should have mid day shade. Plants won’t flower over 85 deg F/29 deg C. If you live in extremely cold climates there is even a strawberry that can grow in -30 deg F/-24 deg C without mulch. During blossoming the weather shouldn’t go below 30 deg. F.

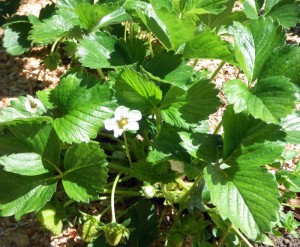
Everbearing strawberry

White flowering, red fruiting, beautiful in the edible landscape

SOIL

Topsoil of turf/loam amended with compost and well rotted manure is best.  Be sure not to get the manure near the crown of the plant.  Dress the bed with bone meal and wood ash. It should be well drained and slightly acidic.

WATER

Water the bed when the soil starts to dry out.  Keep the soil moist, but not over wet. When the berries start to ripen cut the watering in half.  Stop watering when they are ripe. If you give strawberries too much water they will get big, but not taste as sweet. Drip irrigation is best to avoid disease problems and fruit rot.

SITE

Full sun for standard strawberries and partial shade for alpine strawberries.

PLANTING

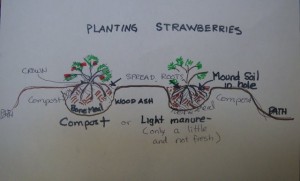
Dig a bed that is loose and friable with good drainage.  Make a hole for your plant and mound the center. Lay the roots around the pyramid of dirt in the hole.  Be sure to keep the crown above soil level or the plant will rot. Water your plant in well. Mulch to keep moisture in. I don’t recommend straw as a mulch because it will promote mildew and be a home for insects.

Description on strawberry planting

Spread their roots and keep the crown above soil level

HARVEST

Wait until the fruit is very red and harvest with the stem. Don’t wash the fruit until you’re ready to eat it.  Homegrown strawberries are like a completely different species than what you will find in the store.  Because you can harvest them ripe and eat them right away.  They will not last long off the plant.

Strawberry fields forever

Strawberries planted in the edible landscape


Jan 252012


by Avis Licht

Size matters in sowing seeds

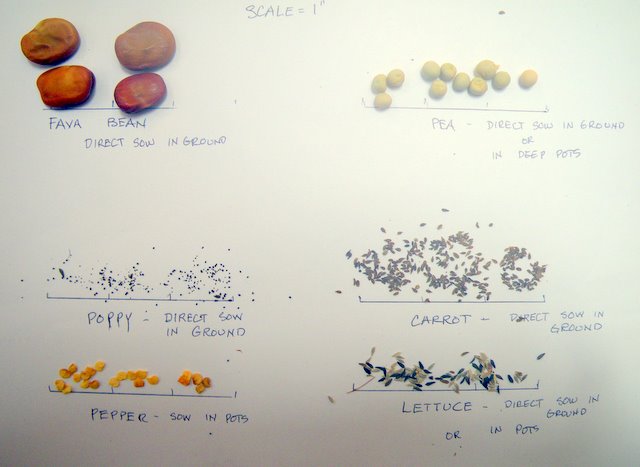
Very large and very small seeds often should be sown directly into the soil

There are times when sowing seed is the best way to start your plants, and times when you would do better to buy seedlings. Here are a few of the most commonly made mistakes and how to avoid them.

Mistake: Sowing seed into pots that should go directly into the ground.

Correct : Sow directly into the ground

Direct sow into the ground for best results

Plants with taproots like beet and carrot need to be sown directly into the ground

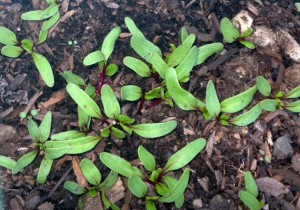
Some seeds are best sown directly into the soil where they will grow. Root crops like carrots, beets, radish and turnips have taproots that don’t like to be transplanted.

Very small seeds, like poppies and carrots can be mixed with sand in order to spread them more evenly.

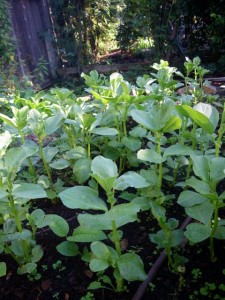
Large seeded plants like beans and peas do better when sown directly into the ground.  You should plant them 2 to 3 inches deep. They send a large root deep into the soil and don’t like to have their roots disturbed.

direct sow your fava beans

Large seeded plants like beans and peas can go directly into the soil.

Mistake: Sowing indoors without sufficient light

Correct: Use additional lights

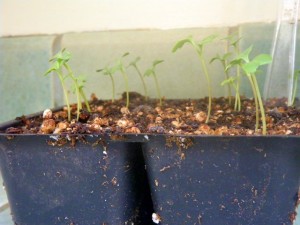
In  the hopes to get a jump on the growing season, people like to start their seeds indoors.  It is almost impossible for plants to get enough light from a window to grow strong and healthy.  Leggy seedlings rarely recover and won’t make for strong plants when transplanted.

Leggy seedlings need more light

These broccoli seedlings are leaning toward the window for more light. They are leggy and not what we’re looking for

If you do want to start indoors, get fluorescent lights and put them over your containers.  You can find these through catalogs or make a simple set up yourself. Full spectrum lights are best, but regular lights will also work.

Mistake: Sowing too soon in the season

Correct: Be patient and wait. Learn the last frost dates for your garden and what your particular plant needs.

In the excitement to get plants ready for planting outdoors, we often start plants too soon.  This is especially true for warm weather crops like tomatoes, cucumbers and peppers. Even if you have a warm spell early in the spring, it doesn’t mean that you’re plants will be happy outside.  Both the night temperatures need to warm up and the soil needs to warm up.

You can plant early if you use special precautions like cold frames, “Wall o Water”, cloches and row covers. These will protect your plants from those extra cold nights.  But don’t sow your seed early  if you’re not prepared to go the extra step for plant protection.

Mistake: Sowing too many seeds and too many difficult to grow and germinate seeds

Correct: If you’re new at sowing, pick a few of your favorite plants that are easy to germinate. Don’t be fooled by those beautiful pictures in the catalogs. Beware impulse buying!

If you have a small garden and would like a variety of vegetables, it’s often better to buy your seedlings from the local nursery or farmer’s market.  You can get just amount that you need and more varieties.  Instead of 20 plants of one variety, why not get several heirloom varieties and see what does best in your garden.


Jan 202012
 
Raised beds


By Avis Licht

Raised beds have many advantages.  They  provide better drainage,  better access, better plant growth and reduced soil compaction.  There are many ways to build a raised bed.  Let’s  see what would be best for your garden.

Raised beds

Double dug beds are raised and need no edging

The Simplest Raised Beds

These don’t need any built up edge, they only need to be double dug.

This act of digging and moving the soil aerates it and raises it up. Here’s a more detailed explanation.  This is especially effective when opening up the soil for the first time.    By creating “beds” instead of rows, you leave paths for walking and you never step on the bed.  This prevents compaction and allows water and air to penetrate the soil, making for healthier roots. It also lets you plant in a more intensive manner.

Double digging is hard work, but doesn’t need to be done every season. In another post I’ll show you the many reasons for using this method, and different ways you can incorporate  fertility.

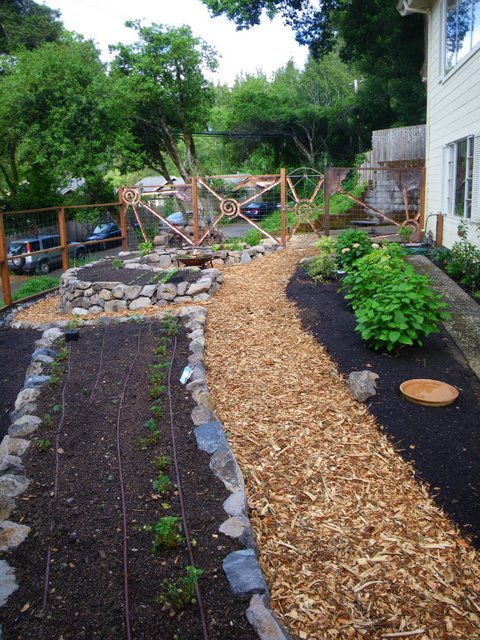
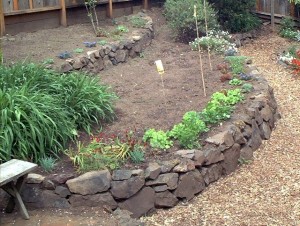
Stone for raised beds

Raised beds using stone for both low and tall walls

Stone Raised Beds

Stone lasts forever, and looks beautiful.  It is also easy to create  curving lines in the garden.

As you can see in the photo above, you can use stone to edge your beds, it defines the line and creates a clear path.You can use it to build a wall, which is especially effective on a slope. In this garden, the curved bed was built to 2 ft high, which helps the owner who has back issues.  We  used the opportunity of the height of the bed to bring in some good organic topsoil.

If you bring in soil, be sure to loosen up the bottom of the bed.  It doesn’t help to bring in good topsoil if you don’t have good drainage.

Cost is a factor in deciding whether or not to use stone.  It can be expensive if you have to buy it, and  it takes time to install it.

buildiing curves with stone is easy

This curved bed looks good even when the garden is dormant

Wood Raised Beds

Wood is commonly used for building raised beds in the vegetable garden. Use recycled wood if possible.  Buying redwood or cedar has many implications to the environment.  If you are only raising the beds a few inches, I don’t think wood is worth the effort or the cost.

If you do use wood, be sure not to use pressure treated wood. This includes old railroad ties. The chemicals in this wood are hazardous to your health and the environment.  This article covers the pros and cons of using wood.

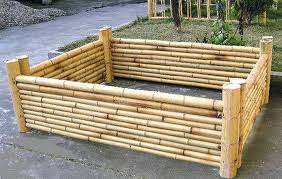
Bamboo raised bed

Bamboo or willow can make a great raised bed, especially if you are growing it yourself

You can even find recycled plastic for raised beds. Kits with all the materials you need can make the project simple.  Gardener’s Supply carries all kinds of raised bed kits.


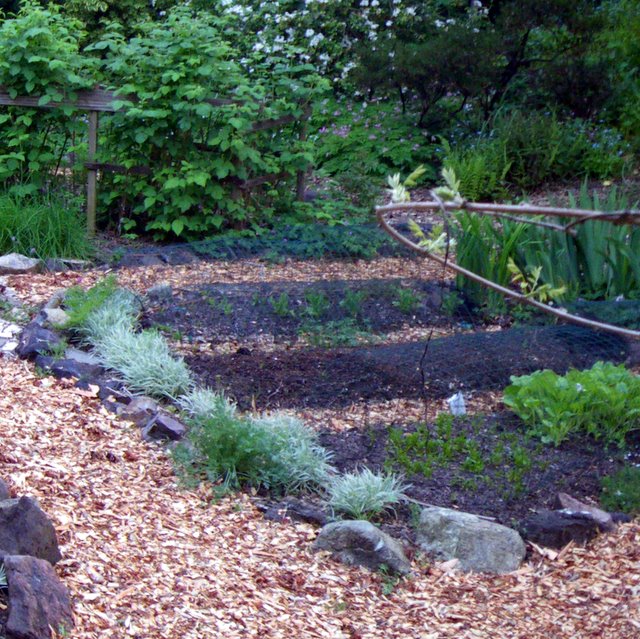
Raised beds with stone from the site

The raised bed just planted


When deciding whether to use raised beds in your edible landscape consider your site, soil, resources and aesthetics.


Vegetable garden

The raised bed a year later-- vegetables and flowers

Jan 172012
 
Pruning a deciduous fruit tree


by Avis Licht

Pruning a deciduous fruit tree

This cut allowed an outside bud to become a branch

Fruit trees give better harvests with good pruning techniques.  That said, most people are worried about pruning their fruit trees. If you are one of those folks that hesitate to make that first cut for fear of damaging your trees, FEAR NOT! With these few easy steps you can help your trees and begin the process of learning how to be a great pruner.

Most trees are very forgiving.  Of course, there’s lots to learn about what different species need, but there are some techniques that work for all trees.

Be sure to use sharp and sturdy clippers.  This will make it easier on you and give better cuts.

Remove dead and diseased wood.

This is only tricky because when the leaves are off the tree sometimes it’s hard to tell what’s dead and what’s alive.  Dead branches are usually darker, wrinkled and brittle.  To check a branch, rub your finger nail along the branch and if it’s green underneath, it’s alive.

Pests and diseases enter a tree through dead or damaged wood.  So this is an easy and useful kind of pruning. Cut the branches back to a live trunk or branch. Remove all dead and diseased wood from the garden.  Don’t put it in the compost or shred it.  These go to the dump.

Remove crossing branches.

Crossing branches need to be pruned out

These are some serious crossing branches


One of the aims of pruning is to open up the tree to air and light. Cut back all crossing and overlapping branches. Remove one of the crossing branches and leave the other.

Prune out the crossing branches

Two branches cut back, one left to grow.

Remove weak branches.

Usually you want to remove thin and weak branches and leave only the most vigorous. But if your tree is young and doesn’t have many branches, leave some of the weaker branches that will produce leaves and feed the tree.  Come back next year and prune those branches.

Remove suckers.

Suckers are the fast growing branches at the base of the tree below the graft.  Keep these cut back throughout the year.  They are from the root stock and you do not want them.  There are also suckers higher up in the tree that grow fast and straight up.  These are water shoots and will not fruit.  They create shade to the tree.  Take these out in mid to late summer.

Keep your shears clean and sharp. Remove all dead leaves and branches from the tree.

If you follow these simple rules you’ll do great good and no harm to your trees. Soon I’ll give you tips on pruning your fruit trees in more detail. In the mean time you should have a look at this simple pruning video from Peaceful Valley Farm Supply.


Jan 132012
 
sowing seeds

by Avis Licht

sowing seeds

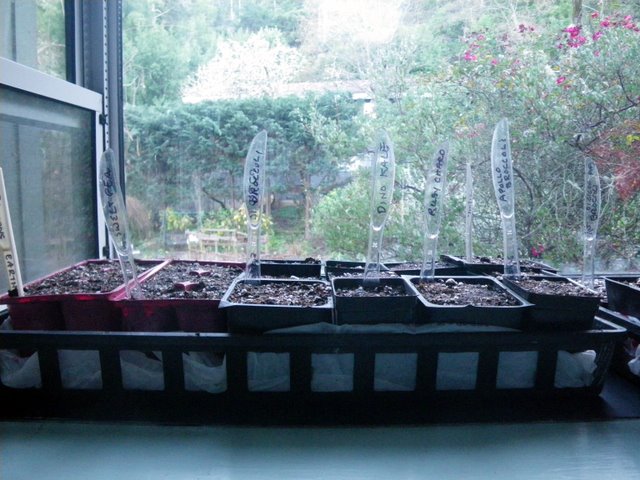
Sowing seeds and germinating in the kitchen window

Seeds, though small in size are a force of nature.  They carry the future in their tiny form. All the information to grow a might oak is in that tiny acorn.  In nature, every seed is slightly different and allows for the possibility of change:  sometimes better, sometimes worse than it’s parent.  Depending on the conditions after sprouting, a seed can grow strong and healthy or be weak. Like a person with a strong immune system, a healthy plant can withstand disease and attack by pests.
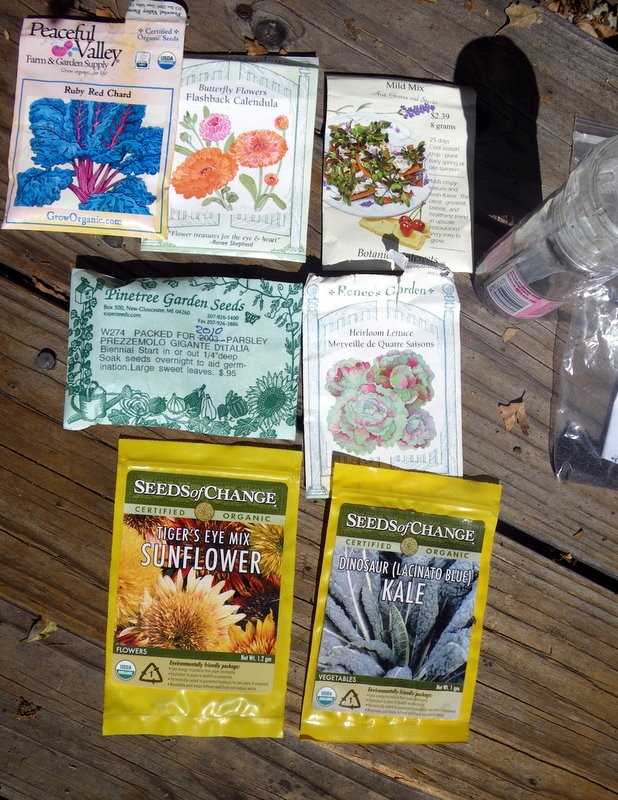
Seed packets

Get seed from organic, reputable seed companies


I’m not going to get into a discussion here about hybrid seeds or GMO, but allow me the premise that healthy plants produce healthy seed and it is to your benefit to choose seed from reputable companies that sell healthy, organic seeds.

It is then up to you to make sure you give those seeds the right growing conditions: from the soil you use to plant them, to the sun and warmth for sprouting. In this post you’ll learn how to mix your soil, sow seed, cover it and water it. It sounds simple, and is, but there are a few basic things you can do to assure success.
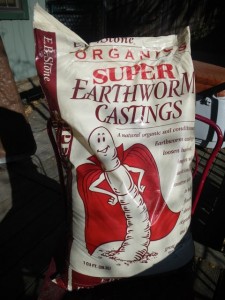
earthworm castings

Earthworm castings are a wonderful medium for starting seeds
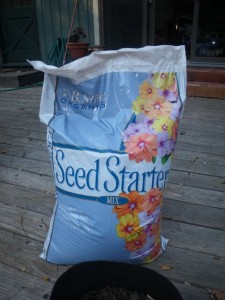
Soilless seed starter medium

Clean, light medium for starting seed is a good idea


1. Choose your seeds: Pick the right plant for your climate it and sow it at the right time. Pick your favorite veggies and see if they are appropriate for your climate and the size of your garden. You can do this by googling your plant, reading seed packets, or talking to your gardening neighbors.  they often have the best information. In the U.S. you can get a lot of information at this site, SmartGardener.com by typing in your zip code.

2.Mix your seed starting medium: Seeds have enough energy in them to germinate and grow their first true leaves.  After that they need some, but not a lot of nutrition in their sprouting medium.  We can call this needing breakfast.  I mix my own compost or earthworm castings in with a medium like the Seed Starter from E.B. Organics. This starter is sphagnum moss, perlite, and gypsum.  It is clean, light and has no real nutrient.  Seeds will germinate and send roots quickly into the medium.  By mixing it with a little compost or earthworm castings you will add “breakfast”.
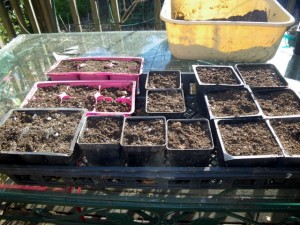
filled seed containers

Put the seed medium into container and tamp it down.
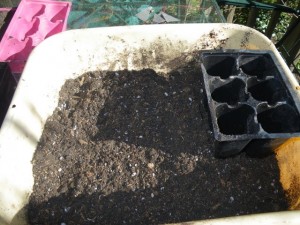
Seed starting medium - mix it up a little

Mix different materials in a container


3. Sow your seeds on the surface.  In the small six packs (recycled, of course from previous use), I put 2 seeds per section.  In the larger 2 inch pots I put 4 seeds per pot, and in the 4 inch container I put 6 – 8 seeds.  I use the larger pots for quick germinating larger plants, like chard and broccoli. I use the smaller pots for lettuce, spinach,bok choy and smaller plants. Lightly cover the seeds.  The smaller the seed, the less soil on top.  Your seed packet will tell you how deep to cover your seed.
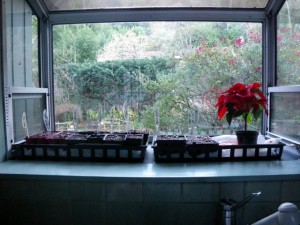
Kitchen window provides sun

In my kitchen greenhouse window I can start seeds early in the season.

4. Lightly water your seeds.  A heavy  flow of water will displace your seeds. Use the lightest setting on your watering wand, a light sprinkling can or a spray bottle.  Be sure that your medium is moist before you put the seed in it.  You want it moist, but not soaking wet. Seeds need to be kept moist until germination.  If they are in the sun, be sure to water them a few times a day.
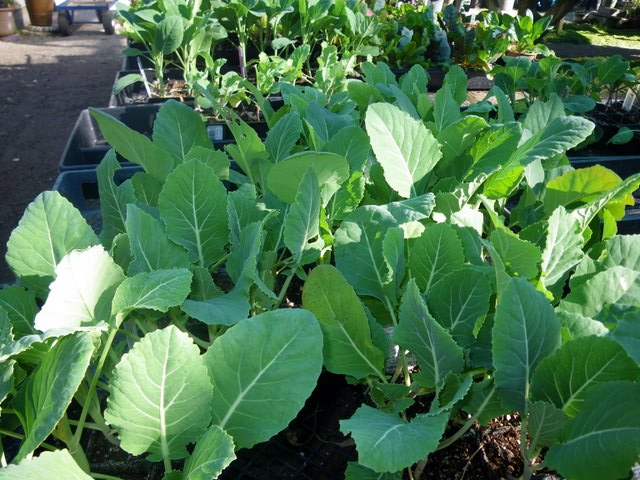
Broccoli seedlings

Seedlings this size are ready for planting outside

Next step will be how to prepare your garden beds.  We’ll talk about that tomorrow.

You’re ready to grow wonderful, delicious food in your edible landscape. Whether you have pots on the deck, a few square feet, or an entire yard for growing, only do as much as you can happily take care of. Remember, you’re trying to enjoy this project.
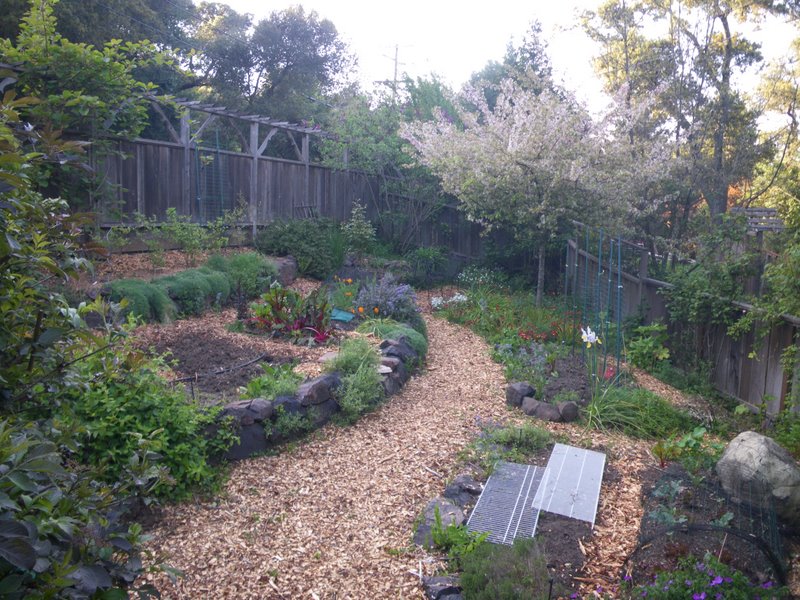
the ornamental vegetable garden

A vegetable garden doesn’t have to be square


Jan 112012
 
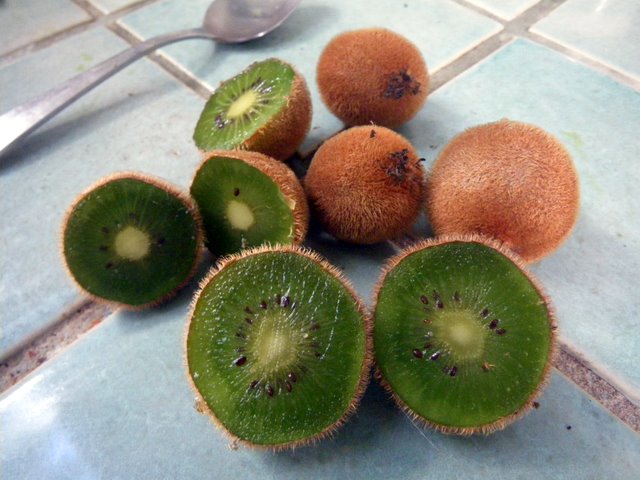
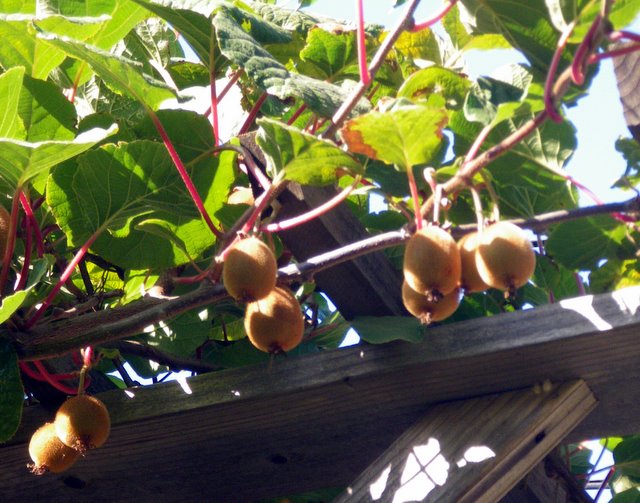
Ripe kiwifruit
Ripe kiwifruit

These fuzzy skinned kiwis are Actinidia deliciosa. They ripen in the late fall.

Kiwis seem exotic, but they grow in many climates. They are fast growing, luscious and need plenty of room to grow on a strong support.

SITE: Full sun, and protected from the wind.

CLIMATE ZONES: All kiwis come from  eastern Asia. Fuzzy skinned kiwis can take cold down to 24 deg F. There are varieties called Arctic Beauty kiwi, that are hardy to well below zero deg. F, and the fruit is much smaller. In very hot climates you may need to protect them from the summer sun. But kiwis grow in a wide range of climates and temperature.
SEX AND THE KIWI: The kiwi vine is strong and rampant and needs a sturdy structure to hold it up.  Place the vines at least 15 ft apart.

You also need a male and female plant for pollination. Sex in the plant world is as important as the human world. When you go to the nursery to get your plants, be sure to look at the label to make sure you get a male and female.  It can take up to 5 years from planting to get fruit.  But once you do, you can get up to 200 pounds per vine.

Kiwi Fruit on trellis

Kiwi vine on a strong trellis

SOIL:  The soil should be moderately rich, with good drainage. Give them plenty of compost.

WATER: They also like regular water through the season. Be sure to mulch your vines well, to keep the soil from compacting and to hold in moisture.

PLANTING: You can put in  bare root plants in winter when they are dormant  or you can put container plants in any time during mild weather.

If your garden is large enough, I recommend the kiwi for your edible landscape as a beautiful vine and a wonderfully producing fruit. It does require pruning and maintenance, but is relatively pest free.

HARVESTING: Kiwis in Northern California ripen in mid to late November.  I started harvesting my fruit mid November.  Kiwis DO NOT ripen on the vine.  They are firm to the touch when picked. Place them in a paper or plastic bag, with an apple or banana, to ripen for about a week.  Be sure to test them often. When they start to give a little, they are ripe.  Just peel it and try it.  If you have a lot of fruit, like I did this year, you can harvest them and place them in the refrigerator or other cool spot where they will stay for a few months without problem.
Bring them into the warm room in a bag to ripen as needed.


Dec 162011
 
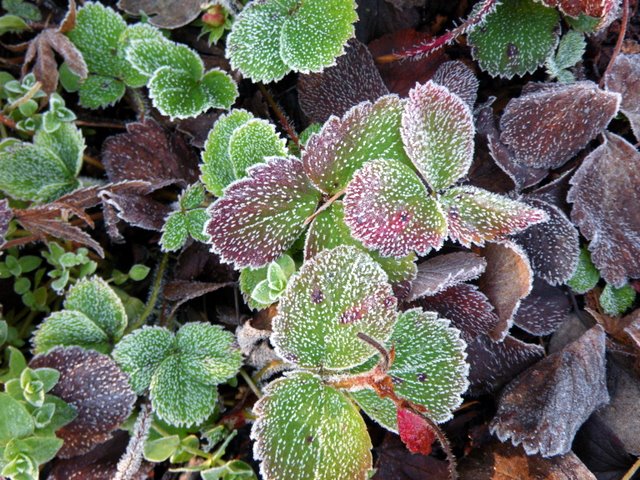
Frost on strawberries

by Avis Licht

Frost on strawberries

Frost comes in different forms, not all are bad for the garden


Some plants actually like a bit of frost. Knowing what to plant for the winter garden will help you be successful. And all frost is not created equal.  A little frost on the plants, like the strawberries in the picture above, doesn’t hurt many plants. Prolonged cold below freezing can cause problems. Be sure to observe your garden for frost pockets as cold settles into lower areas and valleys.

Here’s what you can do if you live in a frosty neighborhood:

1. Choose cold hardy plants for your vegetable garden.  These include: chard, kale, spinach, broccoli, cabbage, brussel sprouts, carrots, beets, kholrabi, peas and turnips and some varieties of lettuce. These plants work if there is thaw during the day.  If they stay continually frozen, you need to put them in an unheated greenhouse  or under hoops that are covered.

Frost on chard is okay

Frost doesn't harm chard if it doesn't go below 20 deg F.

2. Make sure the soil is moist before a big frost.  Moist soil holds 4 times more heat than dry soil.

3. Cover  tender plants with a woven material, blanket or sheet. Preferably not plastic, as this does not protect very well. You can lay the material over the plant, or put up stakes and keep it slightly away from the leaves.  Bring the material down to soil level, as the heat rises up into the covered area.

4. Place tender plants in pots and put in protected areas in south facing walls and under eaves, to get reflected heat from buildings. These would include lemon, lime, lettuce and herbs.

Here’s what you shouldn’t do during frosty days:

1. Don’t prune during frosty days.

2. Don’t prune frost damaged plants like trees and shrubs. Leave the damaged tips and buds on the trees and wait until Spring and let the plants start to grow. Otherwise you stand the chance of having the frost do deeper damage.

3. Don’t use chemical sprays that say they will protect your plants from frost.  There is no evidence to support these claims.

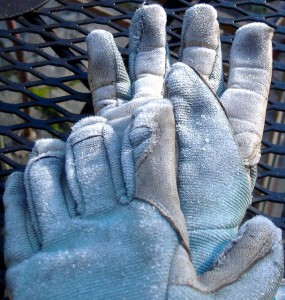
4. Don’t leave your gloves out to get frosted.  They will make your hands cold.  I know, I did this.

Bring your gloves inside, or they'll get frosted too

What good will frosty gloves do you in the garden?

To find out more about growing in winter you should read these books by Eliot Coleman from Four Seasons Farm in Maine.  Winter Harvest Handbook will give you many ideas. Your edible landscape can still produce wonderful food in winter. It may take a little more attention, but can be very rewarding.

Nov 092011
 
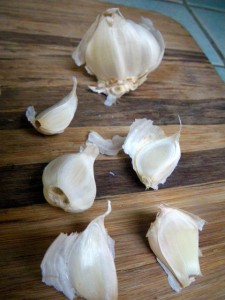
Garlic

Use the largest cloves from the garlic

In mild weather climates, it is still possible to plant your favorites  from the onion family. Garlic, shallots and onions are all in the same family, Allium, and are easy to grow. You need open, sunny ground, in well drained soil that has been fertilized with bone meal and manure.

There are many varieties of garlic to cho0se from. Look in some of these catalogs. My friend Robert Kourik has written a great article on garlic that goes into more detail on varieties and planting techniques.

Garlic is a good plant to put throughout the garden; under fruit trees, around roses and on the edgings of beds.

Shallots are a close relative of the onion that taste like a cross between an onion and garlic and is prized in cooking for its distinctive flavor.

Onion bulbs can also be planted now, but transplanting seedlings and seed sowing need to be done in the Spring.  There are many varieties of onions that require appropriate planting methods.  Consult your local nursery for advice on varieties that grow well in your area.

Even in mild weather climates, it will soon be time to just sit back and enjoy the winter days, reading a good book and taking it easy.  Let the garden just, as one might put it, vegetate.  I’ll be using these days to write about garden design. You can start dreaming about how you might make some changes in your landscape, and put in a few more of your favorite edibles.

Oct 282011
 
A variety of plantsIn a small area you can have a variety of different plants with different needs

A micro climate is not just a little bit of climate. It is a small area that is different from the area around it. It could be warmer or colder, wetter or drier, or more or less prone to frosts.

We are told to look up our climate zone in order to know what to plant.  But the truth is that where we live the “climate ” is affected by the hills nearby, your home, trees, how much asphalt there is nearby, any bodies of water and which way the wind blows.

A shady spot for lettuce

You can create tiny microclimates in your garden beds

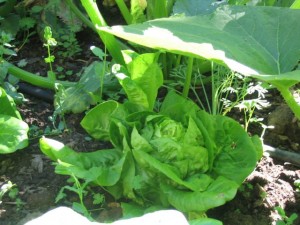
In the picture on the right, I created a small micro climate in the garden bed by planting lettuce with zucchini in the Spring.  The lettuce grew well in the full sun of Spring, then was shaded by the leaf of the zucchini as the sun got hotter. By the time the sun was too hot, the lettuce had already been harvested.

The good news is that you can make use of your own yard’s topography to grow plants that might not ordinarily grow in “your” climate.  For example, if you live in a climate with winter frosts but have a south facing wall with an overhang, you can grow plants such as lemons and limes that like a warmer winter. It could be that even a few degrees of warmth will make the difference between a fruiting tree and a dead tree.

Lemon tree very pretty

This lemon has been moved 4 times, trying to find the right spot

I live in a cold winter climate, with many days of frost. I keep trying to find a good place for my lemon.  It’s not dead yet. But it’s also not filled with fruit.

I put it in the yard which gets 6 hours of sun in the winter, but the frosts were too much for it.  I covered it with our down sleeping bags on really cold nights, but that wasn’t enough.  I moved it to the deck in a pot, but it didn’t get enough sun.  I then moved it to the back yard along a fence that got reflected west sun in the winter.  It’s looking better and I’m not ready to give up yet.  But I do have to mooch lemons off my friends that live in a warmer location.

The main lesson here is to observe your own garden in all its seasons and all its weather.  Notice which plants are thriving and which are struggling.  Look for special nooks and crannies that can give you more warmth, protection or moisture depending on what your plant needs.  To find out more about micro climates, read this great article.


Oct 112011
 
Lay the material over the wire hoop to protect you plants

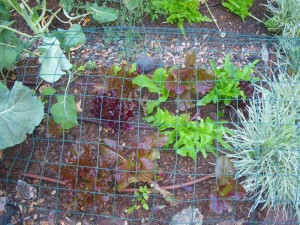
Lettuce under wire can be easily protected from cold weather

Now that Fall is here and we’re thinking about planting for the winter season, you should know about how to extend your growing season.

One really simple and effective product is  light weight material called a row cover.  You simply lay the material over your plants or vegetable beds.

Floating Row Covers protect plants from frost, while letting in sunlight, water and air.

  • Extend early and late growing seasons by providing frost protection down to about 28ºF
  • Aid germination by keeping soil moist
  • Prevent crusting of soil due to hard rains
  • Shield plants from insect pests, including virus-carrying aphids.

You can buy these online at Gardens Alive! an online store that specializes in organic and environmentally responsible products.

These covers can mitigate the effects of cold, but you still need to put in plants that can stand the cold.  It’s not like you can expect your warm weather crops to  thrive. Remember, we’re assisting these plants not changing they’re whole nature.

Click Here For More Good Row Covers


Autumn leaf color in the Sierra Nevada mountains

Beautiful Fall colors


© 2011-2024 Edible Landscaping Made Easy With Avis Licht All Rights Reserved