compost | Edible Landscaping Made Easy With Avis Licht - Part 3

Mar 152012
 
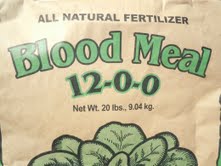
Blood Meal

It says "All Natural" but where did it really come from?

by Guest Blogger Extraodinaire- Robert Kourik, author of Your Edible Landscape Naturally

As organic gardeners, we’re always looking for natural and non-harmful ways to add nutrient to the soil to aid in plant growth.  One of the most important nutrients and one of the hardest to find in organic form is Nitrogen.  Nitrogen encourages leafy growth and fruit and seed production. As plants grow, they take nitrogen out of the soil and it needs to be replaced.  But how? Growing nitrogen fixing plants is one of the best ways to restore it in the soil.  But this takes time.  Compost and manures, which are also excellent for the plants, have relatively small amounts of nitrogen.

Blood meal is a fast-acting, high nitrogen, organic fertilizer. It is concentrated and often thought of as “hot”, meaning  too much can hurt tender root hairs or roots. Often just a light sprinkling is enough.  It can have a nitrogen content of 12.%, 1.00% phosphorus and 0.60% potassium. It can also attract dogs, racoons, possums and other meat eating animals that will dig up the garden beds. Blood meal, as you would expect, is a byproduct of the animal butchering industry. It takes a lot of energy to create blood meal in the form we use it in the garden. We also don’t know how the animals were raised.  So it’s a bit of a stretch to call it “all natural and organic” in the way we want it to be safe and harmless to nature.

By knowing what blood meal is and where it comes from, you can make an informed decision about whether to use it or not.

You can save energy by growing a legume crop solely for the accumulation of nitrogen in the lumpy nodules located on its roots—fertilizer gathered free from the nitrogen in the air. Legumes that produce enough nitrogen for hungry crops (like corn) are  alfalfa, fava beans, clover and peas. Till under the young foliage before it blooms—called green manuring. This will increase the yield of crops without using blood meal. Use green manuring of any legume in any annual vegetable bed.

You can read more about fertilizers and everything else you might want to plant in the edible landscape in Robert Kourik’s book, Designing and Maintaining your Edible Landscape Naturally, at his website: www.robertkourik.com


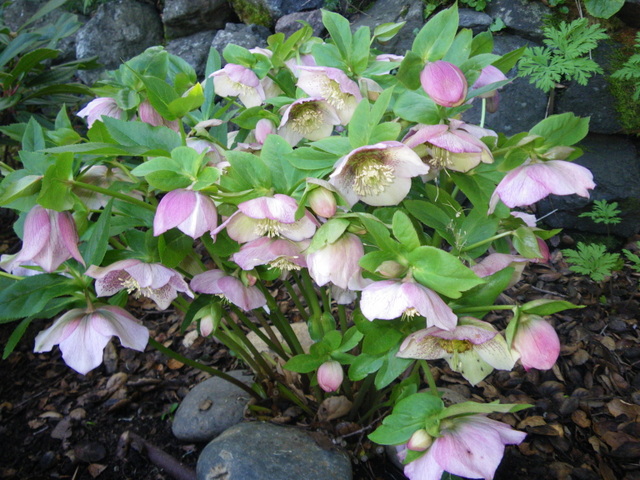
Hellebore

An early flowering, easy to grow plant- Hellebore

Publications


Finally! Here at last! A streamlined, easy to follow e-book on how to start your spring garden. It covers climate, choosing your site, soil types, what to plant,  compost and irrigation.  After forty years of gardening it’s hard to know what not to share.  In this book I’ve winnowed down the information for novice gardeners to encourage and guide them to successful food growing at home.
This is a 20 page guide to get you started on your edible landscape.  If you have enjoyed my blog, be sure to get my booklet. $4.99- such a deal!

IMPORTANT NOTE! Once you go to Pay Pal and pay them, it will send you to a page thanking you.  There is a link on the bottom of the page that you must click to return to my site in order to download the book.  It’s not clear at all on the Pay Pal site, but there doesn’t seem to be a way to make it clearer.  Thanks for your patience and THANKS! for buying the book.  I hope it helps and inspires.

“Avis has condensed over four decades  of gardening skill into one information-packed handbook. This is important reading for the beginning gardener. You will skip making many mistakes by reading this attractive handbook first.” Robert Kourik, Author of Your Edible Landscape – Naturally

Spring Garden Made Easy

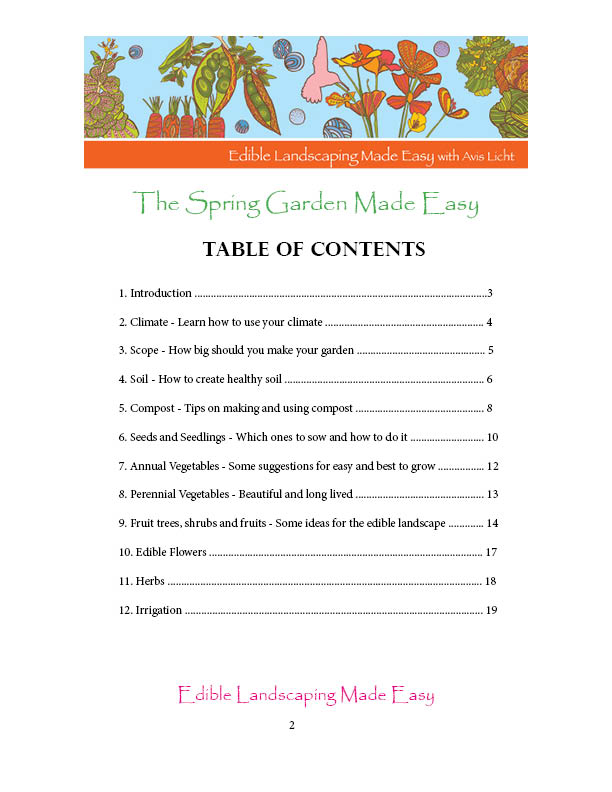
Spring Garden Table of Contents

Here’s what people have said about the website and my writing:

  • Avis, this is beyond helpful! You have surpassed Sunset Magazine with your blogs and images. I’m making many of the mistakes you listed above and will be starting over in the garden this weekend with my beets. Thanks so much! G.N.
  • Excellent article in every aspect! Well detailed and loaded with useful information. I like the idea of 1/2 inch wire mesh in the bed to keep the gofers out. But not just that, the design is beautiful and very practical. And yes, a careful and thoughtful planning goes a long way. Thanks for a wonderful post. M.B.
  • I am fond of gardening and this is my good luck that I found your site; I read all your posts and I am very excited to read new posts from you. It will be very useful to me. E. O.
Submitted on 2011/12/20 at 7:32 am
  • Hi Avis, What a wonderful website! The edible landscaping has become so fascinating for many gardeners, who found so many benefits by growing food producing plants, instead of just ornamental. The commercial strawberry growers are sprinkling the field with water before a hard freezing, to protect the crops. The water is freezing making a layer of ice on the plants, thus protecting the plants from damage.

            I love your well written article, with rich content and detailed information. Excellent advice. I enjoyed the reading.

           Thanks Avis,

Mike

Submitted on 2011/12/12 at 2:51 pm
  • Love your website.. B.M. 
Mar 132012
 
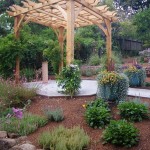
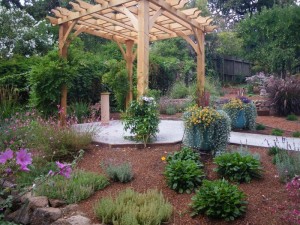
Compost and mulch make a beautiful cover for the sil

by Avis Licht

Compost and mulch make a beautiful cover for the sil

A beautiful garden grown with compost, manure and mulch

An organic fertilizer refers to a soil amendment derived from natural sources that guarantees, at least, the minimum percentages of nitrogen, phosphate, and potash. These include plant and animal by-products, rock powders, seaweed, inoculants, and conditioners.  These minimum amounts can be very small. For example, horse and cow manure  often have less than 1% nitrogen by weight. This is not to say it’s not a good fertilizer, it is. But depending on your plant’s needs, you may need to add other sources of nitrogen.

One word of caution. An organic fertilizer means it comes from natural materials, BUT it doesn’t mean it’s organic.  Cottonseed meal comes from a plant, but cotton is one of the most heavily sprayed crops.  There will be pesticide residues in cottonseed meal unless it specifically says it comes from organic cotton.  Bloodmeal and bone meal take a great deal of production and energy to produce these fertilizers. Plus you don’t know how the animals were raised. It can seem very complicated to stay fully organic. When possible ask for the source of your fertilizer.

We take a short break from our program to let you know about this important news. The Spring Garden Made Easy, by me, Avis Licht, is now available for all you enthusiastic gardeners that want to get your Spring garden planted with the least possible problems. Yes, now you too, can have the Garden of Eden in your back or front yard. Or maybe a few lettuces and tomatoes. It’s all in this 20 page ebook, with easy to follow suggestions.  Links in the book will lead you to much more detailed information.  Try it, you’ll like it. Only $4.99.
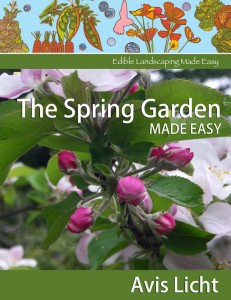
Spring Garden Made Easy

This is the cover to my book. 

Spring Garden Table of Contents


Different manures have different nutrient values based on the animal, what it ate, how much bedding is in the manure and so on. In another post I’ll talk about the relative merits of different manures. For now, let’s just agree that manure from herbivores that is composted, is a good organic fertilizer. I say herbivores, because we don’t want to use poop from meat eating animals like dogs, cats or humans.  There is risk of parasites or disease organisms that can be transmitted to humans from meat eating animals. For ease of listing, here are Vegetable fertilizers: alfalfa meal, cotton seed meal, green manure, sea weed, wood ash. Animal by-products include: manure, blood meal, bone meal, fish meal, feather meal and bat guano. Mined minerals include: rock phosphate, green sand, gypsum.

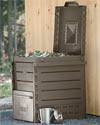
compost bin

Compost bin for a family of 4 – 6 people

The easiest fertilizer is compost that you make at home from material in your yard.  But it takes a LOT of material to make a little compost. You’ll probably have to bring in compost or topsoil when you first start your garden. This is not terrible, it just costs money and uses outside resources.  Sometimes we have to do that.

Soil amendments are materials that don’t have a minimum amount of nutrient, like compost.  They can be worked into the soil or laid on top. Amendments are important for the humus they add, the tilth, and aeration of the soil. Without proper soil aconditions, it doesn’t matter how much nutrient you put in.  Roots need air, water and microbial activity, which all comes from adding organic amendments.

Mulch is material laid on the surface and does not add nutrient to the soil until it breaks down over time. Mulch protects the soil from compaction, erosion and keeps the weeds down.  It also conserves water. Even though we don’t call it a fertilizer, it’s a very important part of the garden and soil and plant health.

In previous posts I wrote about legumes, which fix nitrogen and wood ash.  Keep coming back, as I’ll go through the whole list of fertilizers. In the mean time, dig up your beds, or sheet mulch them, and then add compost and/or composted manure.  You’ll be off to a good start.

Mar 092012
 
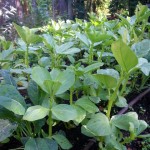
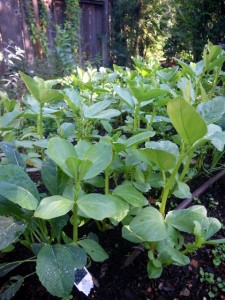
Fava beans

by Avis Licht

Fava beans
Beans are legumes that “fix” nitrogen

Nitrogen is absolutely vital to plant health, and legumes are the plant world’s way of taking nitrogen out of the atmosphere and putting it into the soil. I think that’s pretty amazing. Therefore, legumes are a gardener’s best friend. Next to rain, which of course is our best, best friend. I’ve written on how rain also brings down nitrogen from the air to the soil for plant use. This is also amazing. But that’s nature for you.Most nitrogen in the world is in the form of a gas – which most plants can’t use. However, legumes, which are in the pea family, grab nitrogen from the air and store it in their roots on nodules. It’s actually a bacterium call Rhizobium that converts the nitrogen gas into a form that will be released into the soil that plants can use. This bacteria occurs naturally in the soil. You can increase the amount of nitrogen that a plant will fix by adding more of this bacteria, known as an inoculant. You can buy coated seed or buy the rhizobium and coat your own seed. You can find out more about them from Peaceful Valley Farm Supply


Here’s a short plug for my book on putting in a Spring Garden. (Keep on reading for more info on legumes.)Spring Garden Made Easy


To help you get started on your Spring Garden,there’s plenty of good advice in my ebook:The Spring Garden Made Easy. It’s $10. If you’ve gotten useful information from my blog,here’s a way to keep me going. Thanks for reading. Be sure to leave a comment and let me know if you have any questions or suggestions. I love to hear from you.


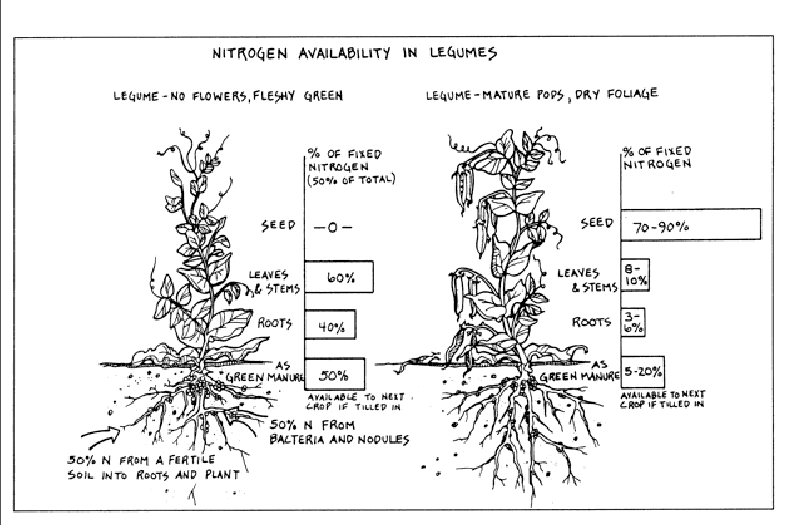
The most commonly grown legumes for nitrogen fixing are alfalfa, clover, fava beans, vetch and peas. The best time to harvest your legumes is BEFORE they flower and form seed pods.  The pods take up most of the nitrogen.  You can cut the plant at the base, leaving the roots in the ground and either put the green tops into the compost pile, or work the greens into the ground.  If you put the “green manure” into the ground it will release the nitrogen over time.  Initially the nitrogen will not be available to  your next crop because it will be tied up in the decomposition process. What this means is that you should plan ahead for legume planting, so that you have time for the greens to break down in the soil before planting your next crop. Legumes make a wonderful cover crop for the winter, and at the same time  prepare your soil for spring planting. If you need to plant immediately, I suggest you put the greens on the compost pile, leaving the roots in the ground.

Nitrogen in legumes

This diagram shows the difference in nitrogen availability in young and old plants. It is from Robert Kourik's book, Designing and Maintaining Your Edible Landscape (used with permission)

There will be more information on organic fertilizers in the next few posts.  Subscribe to my blog and you won’t miss any of this useful information. Robert Kourik will tell you about blood meal – the pros and cons.  Find out about other safe and interesting ways to fertilize your garden organically.


Mar 072012
 
spring flowers

by Avis Licht

spring flowers

Flowers, trees and shrubs love wood ash spread lightly around the base

Just like humans, plants need food to grow well. Where we use protein, minerals and carbohydrates for fuel and growth, plants need nitrogen, phosphorus, potassium and a slew of micronutrients. Over the next few posts, I’ll be writing about different organic amendments. Before you add to the soil it’s important to know at least something about your own soil. Since most of us don’t  know what is in our soil, here are a few  ways to figure out a little about your soil.

You can buy a soil testing kit at your local nursery, or online at Gardener’s Supply. This is a simple and easy to use kit to find out the basics of your soil needs including nitrogen, phosphorus and potassium.

Existing plants, also known as weeds, are a good indicator of soil health and type. If you have lush plants, that are green and healthy looking, you can probably deduce that you’ve got fairly good soil. If plants seem small and stunted, this could mean several things. Compacted soil, low nutrient level or lack of water are the main culprits. This article on Weeds as Indicators of Soil Conditions will tell you much
more about plants as indicators.

Spring Garden Made Easy

 Here’s my new ebook on starting your Spring Garden. 20 pages to help you figure out where to put, what to put in it, and how to keep it healthy.


For those who use a wood stove, wood ash is a free and excellent source of nutrients for the garden.  There are some caveats, so listen up.


Wood ash as fertilizer

Lightly spread wood ash around your plants


1. Wood ash is a source of potassium, lime and trace elements

2. Since wood ash is derived from plant material it contains most of the 13 essential nutrients that soil must have for plant growth.

3. When wood burns, nitrogen and sulfur are lost as gases, but calcium, potasium, magnesium and trace elements remain.

4.After wood burns it has liming agents which raise the pH, this neutralizes acid soil. That means if you have acid soil as in the Northwest of the United States, adding ash wood reduce the acidity.  This is good news for some plants and bad news for others. Read on.

5. If you have acid loving plants like blueberries, rhododendrons, azaleas and gardenias you don’t want to use ash around them

6. Do use ash on flower beds, fruit trees, lawns and shrubs.


7. The fertilizer value depends on the type of wood you burn.  As a general rule hardwoods like Oak produce 3 times more ash per pound of wood and contain 5 times more nutrients than soft woods like Douglas Fir.8. Use one half to one pound of ash per year for each shrub or rosebush.

9. Don’t leave ash in lumps or piles, it can leach too many salts in one place.

10.Use wood ash in compost piles to help maintain the best environment for micro organisms.  Spread a little ash out in layers between adding weeds and kitchen waste to the pile.

11. Don’t use as on newly germinated seeds, it has too many salts for little plants.

(If you are reading this in your email because you are subscribed to my blog, you may want to click on the title and read it in my website.  You’ll have access to all the other posts AND My Book! the Spring Garden Made Easy.)

Wood ash in metal container

Be sure your ashes are cool and in a non flammable container

Mar 022012
 
Spring Garden Made Easy


Finally! Here at last! A streamlined, easy to follow e-book on how to start your spring garden. It covers climate, choosing your site, soil types, what to plant,  compost and irrigation.  After forty years of gardening it’s hard to know what not to share.  In this book I’ve winnowed down the information for novice gardeners to encourage and guide them to successful food growing at home.
Alan Chadwick was a visionary: eccentric, knowledgeable and formidable. He was also my gardening teacher.  He was a master and we were the apprentices, in the old fashioned sense of the word.  We worked long hours, from before the sun rose to sunset.  We learned about seeds, soil, flowers, herbs, fruit and service.  Service to the earth.  Following the laws of nature to ensure healthy, beautiful and bountiful gardens. Always organic, but much more than that, Alan looked deep into the relationships between plants, animals and humans.  My blog and this e-book is the culmination of years of gardening.

Robert Kourik author of  “Your Edible Landscape – Naturally” has this to say:

Avis has condensed over four decades of gardening skill into one information-packed handbook. This is important reading for the beginning gardener. You will skip making many mistakes by reading this attractive handbook first.”

You can buy “The Spring Garden Made Easy” now for only $10, by clicking on the button!

Buy this e-book for the price of a movie. It will be just as entertaining, only without the popcorn.

Those of us who had the privilege of working and studying with Alan now have the obligation to share what we’ve learned.  I hope in this blog, to do just that.  Each topic, a window into a way of working in the garden, simply, carefully and with intention to do no harm. I hope in the e-books that I write, that you can begin to see a little into that world. Of course, the most important part, is the teachings of the gardens themselves.  Open your eyes, ears, nose and mind and learn something new everyday in the garden.

Spring Garden Table of ContentsThe first book, The Spring Garden Made Easy, is aimed at helping you start out, one step at a time to be successful and inspire you to keep going. There will be set backs – snails, earwigs, gophers, deer, they all want a part of your garden. We learn to how to keep them from getting too much and even how to share. Click on the Buy Now button above or on the right side of the web page and you can download it immediately.My hourly consultation is definitely more than $10, which is the cost of the book.  Since I can’t be with all of you in your garden, take this opportunity to pick my brain by buying the book.  Be sure to sign up for the blog as well, it’s free and it’s got lots of information.  I always love to hear from my readers.  Leave me a comment and let me know how your garden grows.In the joy of gardening, Avis

P.S. If you’re reading this in your email, you won’t see the website.  So click on the title and it will take you to all my posts.

Feb 202012
 
Spring flowers

by Avis Licht –

Coffee, especially organic

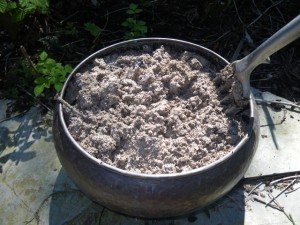
Drink your morning coffee, then put it in the compost.

Great news for coffee drinkers in the gardening world! Although many people love to drink coffee, it has often gotten a bad rap about its health effects.  Well, I’m here to say that a very reputable source has reported that coffee is very good for your health.  Especially if you’re a woman.  What has this got to do with your garden? Keep on reading!

Here’s what Dr. Sadja Greenwood has to say about coffee in her health blog.

“Positive news about caffeine and coffee is on the rise! Annia Galano, a Cuban chemist, recently published a paper suggesting that coffee is one of the richest sources of healthful antioxidants in the average person’s diet. It scavenges free radicals that can have damaging effects on the body. Here is a summary of recent research.Less Cognitive decline: A study found that women over age 65 who drank over three cups of coffee a day showed less cognitive decline over 4 years than those drinking one cup or less. No such relationship was found for men in this study.(Too bad for you guys.)  Decaf coffee and caffeine alone did not give this protection.” That’s the good news about coffee drinking for us coffee lovers.
The better news about all those extra coffee grounds is that they are fantastic for your garden.
  • They contain nitrogen, and provide generous amounts of phosphorus, potassium, magnesium, and copper.
  • It is a myth that used grounds are highly acidic.  The acid in coffee is reduced by the water when the coffee is brewed.  What’s left is not highly acidic.
  • Grounds are best used in the compost, or mixed into the soil. Don’t use them as a mulch on the surface, as the grounds tend to grow moldy and get hard.
  • Worms love coffee grounds. You can safely put them into your worm bins.

Here’s a link to another article on composting and coffee. It has lots of information:Coffee grounds in the garden.

Spring flowers

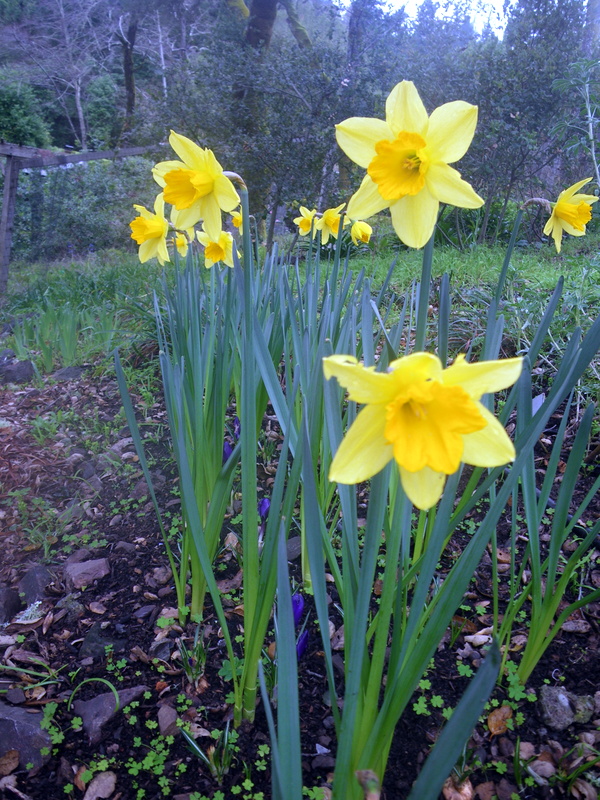
Enjoy a cup of coffee while walking around your garden in the morning

Feb 082012
 
New plantings in the spring garden


by Avis Licht  –

New plantings in the spring garden

Pots near the kitchen are great for herbs


Early Spring is the time for gardeners to get ready for their early vegetable garden.Here are a few things to think about to help you get started.

SITE

1. Pick a place near the house for your vegetable garden so that you will see it everyday. Out of site is out mind for most people. Visit your garden for at least 10 minutes a day and you will keep up with the maintenance and see how plants are doing.  You’ll discover if there are any problems before it’s too late.

2. Pick a sunny site that gets at least 6 hours of sun. Most vegetables need this amount to grow well.

3. Make sure there’s water near by for irrigating.

SIZE

Raised bed gardening

Easy to reach, easy to plant, easy harvest, it's a raised bed

1. Keep it Small and Simple, as the saying goes. First time gardeners should start small and be successful.  Graduate to a larger plot next year. A couple of beds, 3 ft x 6 ft, will give plenty of delicious vegetables.

2. Consider growing your herbs in pots near the kitchen where they are easy to harvest.

SOIL

1.Whatever kind of soil you  have, be sure to loosen it and add compost. By aerating your soil and adding humus you will increase oxygen, nutrients and drainage, which will help your plants grow. You can loosen your soil by digging, rototilling or bringing in topsoil and adding it to a raised bed.

2. Check your soil for drainage. If you see standing water on the surface, or if you dig a hole and there is water in the bottom, you need to make some adjustments. Vegetables don’t like to grow in standing water.  There are several ways to improve drainage.  Dig into the hard soil with a digging fork and loosen it. Raised beds provide better drainage. You can also dig a small ditch and direct it away from the growing area. This will help move water away and improve your soil.

3. Create paths for walking in the garden.  Every time you walk on the soil you compact it. This prevents air and water from entering. Just by using paths and not walking on the beds you will increase the health of your soil and your plants.

CHOOSE YOUR VEGETABLES WISELY

Choose your plants wisely

Early spring you can sow and plant broccoli, cabbage, cauliflower

1. Choose your favorite foods to grow. Zucchinis are easy to grow, but if you don’t like them, don’t grow them! Peas, carrots, beans and tomatoes taste better when harvested ripe and fresh. They are easy to grow and harvest.

2. Choose what grows best in your climate and your site. If you’re in the cool Northwest  U.S. you might want to pass up on the hot peppers and melons.  Cooler climates are good for broccoli, cabbage, lettuce, spinach, chard and kale. If you’re in a hot climate go for the peppers, melons, squash and eggplant.

3. Look for micro climates in your garden to give you more opportunities to grow plants that you might otherwise leave out. A micro climate will be a place that is sunnier ( on the south side of the house), cooler (on the north side), calmer (on the lea side of a fence or windbreak), shadier (under a tree) and so on. Check out your garden for mini climates.

RESOURCES

1.Your local nurseries will be carrying plants appropriate for your climate.  Ask them questions.

2. For the Western United States, consult Sunset Western Gardening Book.  It is amazing in it’s information for so many regions in the West.

3. Seed Catalogs and Online companies. Check out my list in the resource page.

Raised beds

Double dug beds are raised and need no edging


Jan 302012
 
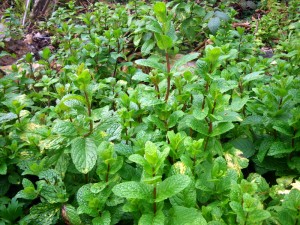
Mint in the garden

by Avis Licht

Mint in the garden

Mint is wonderful, but don't let it escape into the rest of the garden


Mints are quite possibly the easiest, most useful and most annoying herb in the garden. They are tough, unfussy, grow almost anywhere, are incredibly good for your health, can be used in drinks, cooking, insect repellant, digestive aid and more. And they will spread like the dickens in your garden.

PERENNIAL 

Mint is a perennial and will die back in the winter in cold climates. In mild climates you can expect to harvest it all year long.  To have mint in the winter, put it in a pot (you probably want to do this anyway to keep it from spreading) and put it in a protected spot.

VARIETIES

You can find all kinds of mint flavors without resorting to artificial color and flavorings. Imagine – chocolate mint!(M. x piperita “Mitcham”) It tastes like a peppermint patty. Orange ( M. x piperita citrata) or bergamot mint has a slightly orange flavor. Apple mint, pineapple mint, and golden apple mint are all easy to grow. Pennyroyal (M. pelugium) is a small creeping mint that has a very strong flavor and is used  to keep fleas and insects away. Peppermint (M. piperita) and spearmint  (M. spicata)are the most commonly used mints for teas. By growing your own mint you can match the mints with your own preferences. These are just a few of the mints. Go wild!

SOIL

Almost any soil will grow mint, but it prefers a rich, moist soil.  Amend with compost. If you plant it in the ground, consider putting it in a pot or bucket to keep it from spreading. A root barrier around the plants also helps to keep them in check.

PROPAGATION

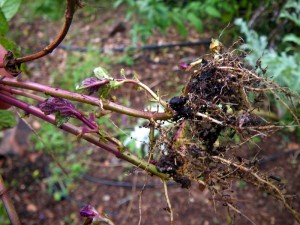
The easiest way to propagate mint is to dig up some from the garden and divide it into as many pieces as you want plants. In this photo, I literally ripped it out of the ground.  It has roots and can be plopped into a pot or a safe place in the garden.

Roots of a mint plant

Pull them out of the ground and replant , as simple as one - two

HARVEST

Clip off the the tender new growth. Use it fresh, as mint loses much of its flavor and healthful qualities when dried. If your plants get old and woody, just cut them back to the ground and they’ll send up fresh new shoots.

Never say you weren’t warned!

MINT IN THE LANDSCAPE

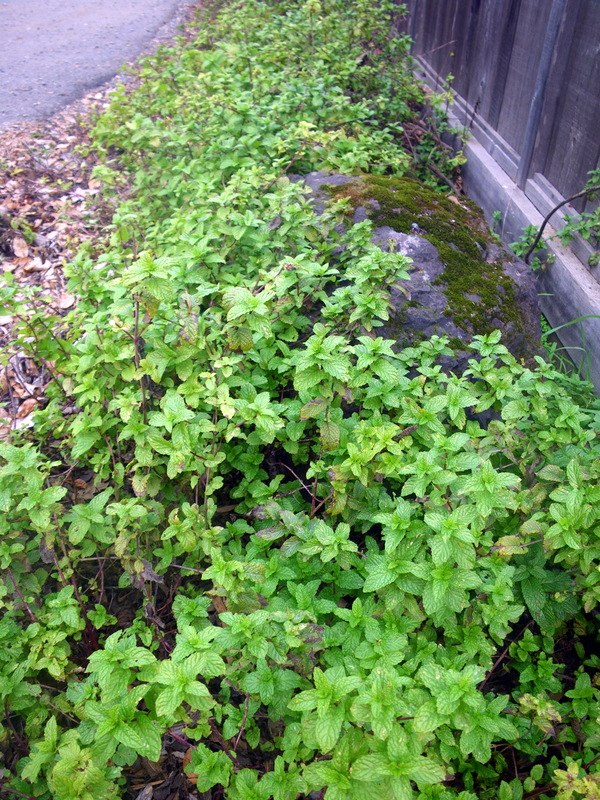
I’ve let this mint grow as the edging to my garden fence.  Cars regularly run over it, but it doesn’t seem to care.  I only use the mint inside the garden for my edible use. Roadside herbs are not the best for eating. But it sure smells good when you step on it.

Mint along the road

Mint as an edging in the edible landscape


Jan 262012
 
Strawberry

by Avis Licht

Strawberry

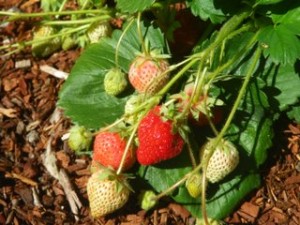
Who can resist a ripe strawberry?

I recently wrote about fruits that you can grow in small yards. At the top of the list was strawberries. Here are some easy tips to get the best fruit from your plants.

There are many varieties of strawberries. June bearing produce one large crop a year in late spring or early summer. Pick the varieties best suited to your climate. Everbearing strawberries have smaller crops in early summer and fall. Day neutral bear intermittently through the summer.  Since you’re planting for your own use I think it’s best to have several varieties that bear throughout the whole growing season.

CLIMATE

You can find a strawberry for almost any climate. In very hot areas they should have mid day shade. Plants won’t flower over 85 deg F/29 deg C. If you live in extremely cold climates there is even a strawberry that can grow in -30 deg F/-24 deg C without mulch. During blossoming the weather shouldn’t go below 30 deg. F.

Everbearing strawberry

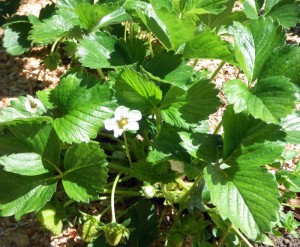
White flowering, red fruiting, beautiful in the edible landscape

SOIL

Topsoil of turf/loam amended with compost and well rotted manure is best.  Be sure not to get the manure near the crown of the plant.  Dress the bed with bone meal and wood ash. It should be well drained and slightly acidic.

WATER

Water the bed when the soil starts to dry out.  Keep the soil moist, but not over wet. When the berries start to ripen cut the watering in half.  Stop watering when they are ripe. If you give strawberries too much water they will get big, but not taste as sweet. Drip irrigation is best to avoid disease problems and fruit rot.

SITE

Full sun for standard strawberries and partial shade for alpine strawberries.

PLANTING

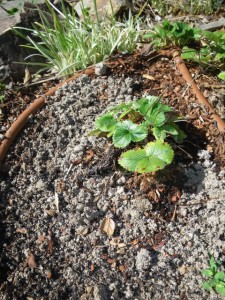
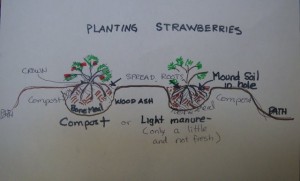
Dig a bed that is loose and friable with good drainage.  Make a hole for your plant and mound the center. Lay the roots around the pyramid of dirt in the hole.  Be sure to keep the crown above soil level or the plant will rot. Water your plant in well. Mulch to keep moisture in. I don’t recommend straw as a mulch because it will promote mildew and be a home for insects.

Description on strawberry planting

Spread their roots and keep the crown above soil level

HARVEST

Wait until the fruit is very red and harvest with the stem. Don’t wash the fruit until you’re ready to eat it.  Homegrown strawberries are like a completely different species than what you will find in the store.  Because you can harvest them ripe and eat them right away.  They will not last long off the plant.

Strawberry fields forever

Strawberries planted in the edible landscape


Jan 172012
 
Pruning a deciduous fruit tree


by Avis Licht

Pruning a deciduous fruit tree

This cut allowed an outside bud to become a branch

Fruit trees give better harvests with good pruning techniques.  That said, most people are worried about pruning their fruit trees. If you are one of those folks that hesitate to make that first cut for fear of damaging your trees, FEAR NOT! With these few easy steps you can help your trees and begin the process of learning how to be a great pruner.

Most trees are very forgiving.  Of course, there’s lots to learn about what different species need, but there are some techniques that work for all trees.

Be sure to use sharp and sturdy clippers.  This will make it easier on you and give better cuts.

Remove dead and diseased wood.

This is only tricky because when the leaves are off the tree sometimes it’s hard to tell what’s dead and what’s alive.  Dead branches are usually darker, wrinkled and brittle.  To check a branch, rub your finger nail along the branch and if it’s green underneath, it’s alive.

Pests and diseases enter a tree through dead or damaged wood.  So this is an easy and useful kind of pruning. Cut the branches back to a live trunk or branch. Remove all dead and diseased wood from the garden.  Don’t put it in the compost or shred it.  These go to the dump.

Remove crossing branches.

Crossing branches need to be pruned out

These are some serious crossing branches


One of the aims of pruning is to open up the tree to air and light. Cut back all crossing and overlapping branches. Remove one of the crossing branches and leave the other.

Prune out the crossing branches

Two branches cut back, one left to grow.

Remove weak branches.

Usually you want to remove thin and weak branches and leave only the most vigorous. But if your tree is young and doesn’t have many branches, leave some of the weaker branches that will produce leaves and feed the tree.  Come back next year and prune those branches.

Remove suckers.

Suckers are the fast growing branches at the base of the tree below the graft.  Keep these cut back throughout the year.  They are from the root stock and you do not want them.  There are also suckers higher up in the tree that grow fast and straight up.  These are water shoots and will not fruit.  They create shade to the tree.  Take these out in mid to late summer.

Keep your shears clean and sharp. Remove all dead leaves and branches from the tree.

If you follow these simple rules you’ll do great good and no harm to your trees. Soon I’ll give you tips on pruning your fruit trees in more detail. In the mean time you should have a look at this simple pruning video from Peaceful Valley Farm Supply.


Jan 132012
 
sowing seeds

by Avis Licht

sowing seeds

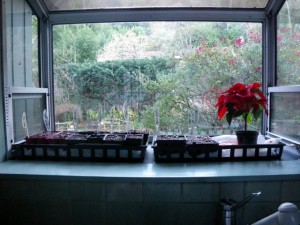
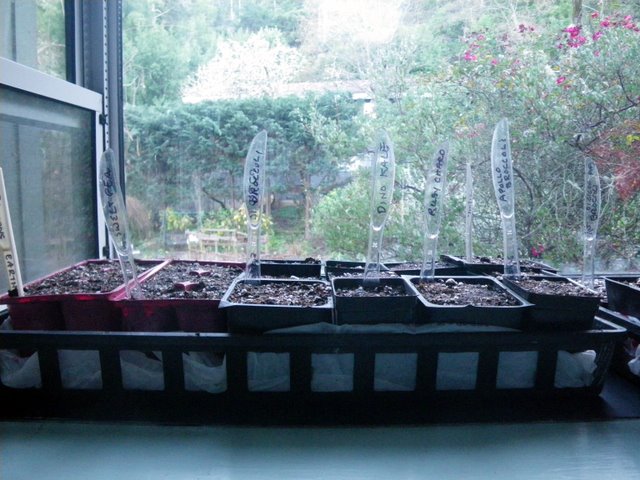
Sowing seeds and germinating in the kitchen window

Seeds, though small in size are a force of nature.  They carry the future in their tiny form. All the information to grow a might oak is in that tiny acorn.  In nature, every seed is slightly different and allows for the possibility of change:  sometimes better, sometimes worse than it’s parent.  Depending on the conditions after sprouting, a seed can grow strong and healthy or be weak. Like a person with a strong immune system, a healthy plant can withstand disease and attack by pests.

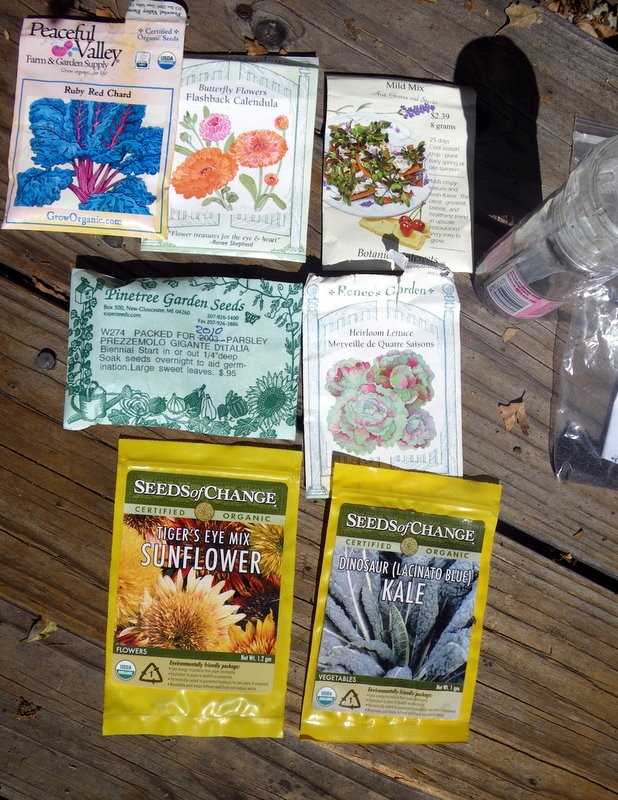
Seed packets

Get seed from organic, reputable seed companies


I’m not going to get into a discussion here about hybrid seeds or GMO, but allow me the premise that healthy plants produce healthy seed and it is to your benefit to choose seed from reputable companies that sell healthy, organic seeds.

It is then up to you to make sure you give those seeds the right growing conditions: from the soil you use to plant them, to the sun and warmth for sprouting. In this post you’ll learn how to mix your soil, sow seed, cover it and water it. It sounds simple, and is, but there are a few basic things you can do to assure success.

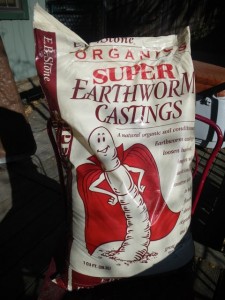
earthworm castings

Earthworm castings are a wonderful medium for starting seeds

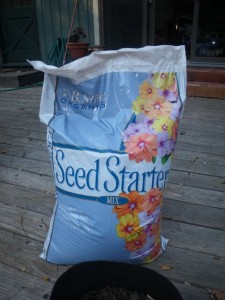
Soilless seed starter medium

Clean, light medium for starting seed is a good idea


1. Choose your seeds: Pick the right plant for your climate it and sow it at the right time. Pick your favorite veggies and see if they are appropriate for your climate and the size of your garden. You can do this by googling your plant, reading seed packets, or talking to your gardening neighbors.  they often have the best information. In the U.S. you can get a lot of information at this site, SmartGardener.com by typing in your zip code.

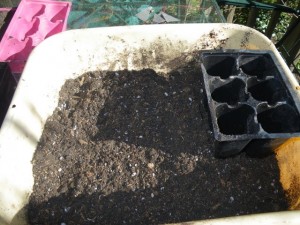
2.Mix your seed starting medium: Seeds have enough energy in them to germinate and grow their first true leaves.  After that they need some, but not a lot of nutrition in their sprouting medium.  We can call this needing breakfast.  I mix my own compost or earthworm castings in with a medium like the Seed Starter from E.B. Organics. This starter is sphagnum moss, perlite, and gypsum.  It is clean, light and has no real nutrient.  Seeds will germinate and send roots quickly into the medium.  By mixing it with a little compost or earthworm castings you will add “breakfast”.

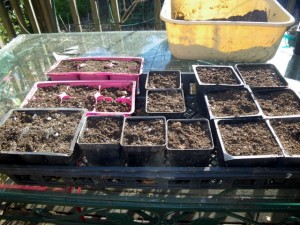
filled seed containers

Put the seed medium into container and tamp it down.

Seed starting medium - mix it up a little

Mix different materials in a container


3. Sow your seeds on the surface.  In the small six packs (recycled, of course from previous use), I put 2 seeds per section.  In the larger 2 inch pots I put 4 seeds per pot, and in the 4 inch container I put 6 – 8 seeds.  I use the larger pots for quick germinating larger plants, like chard and broccoli. I use the smaller pots for lettuce, spinach,bok choy and smaller plants. Lightly cover the seeds.  The smaller the seed, the less soil on top.  Your seed packet will tell you how deep to cover your seed.

Kitchen window provides sun

In my kitchen greenhouse window I can start seeds early in the season.

4. Lightly water your seeds.  A heavy  flow of water will displace your seeds. Use the lightest setting on your watering wand, a light sprinkling can or a spray bottle.  Be sure that your medium is moist before you put the seed in it.  You want it moist, but not soaking wet. Seeds need to be kept moist until germination.  If they are in the sun, be sure to water them a few times a day.

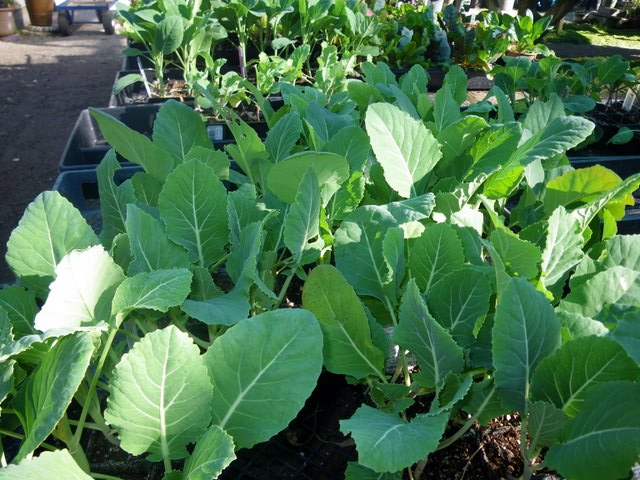
Broccoli seedlings

Seedlings this size are ready for planting outside

Next step will be how to prepare your garden beds.  We’ll talk about that tomorrow.

You’re ready to grow wonderful, delicious food in your edible landscape. Whether you have pots on the deck, a few square feet, or an entire yard for growing, only do as much as you can happily take care of. Remember, you’re trying to enjoy this project.

the ornamental vegetable garden

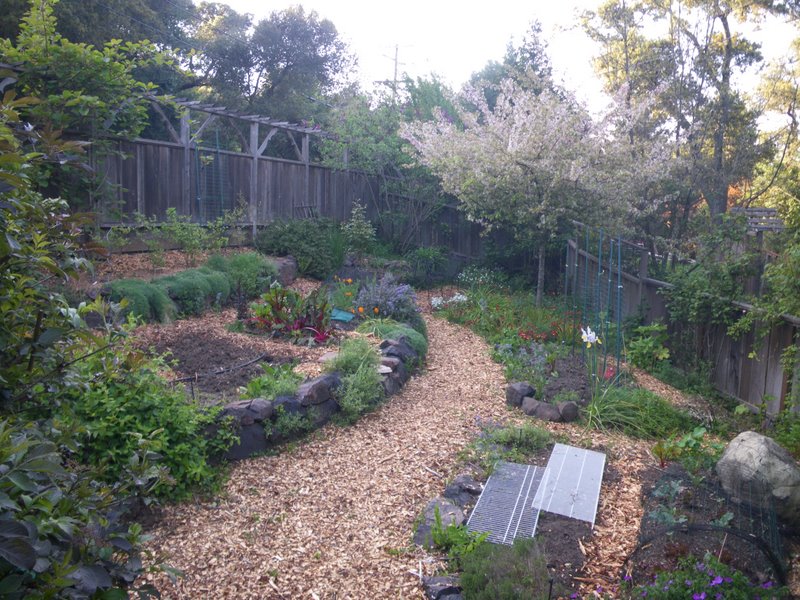
A vegetable garden doesn’t have to be square


Jan 112012
 
Ripe kiwifruit
Ripe kiwifruit

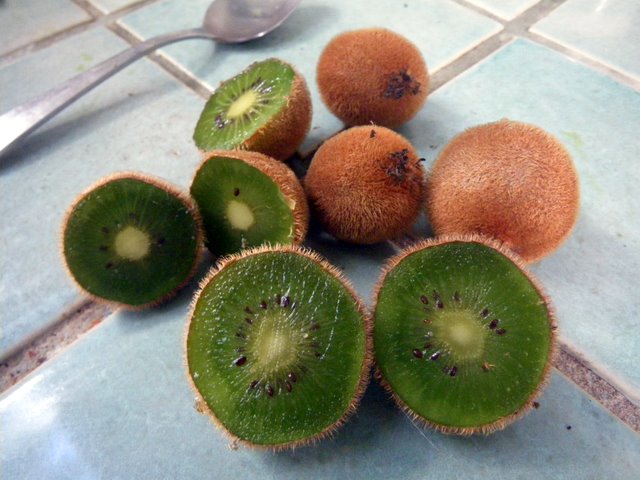
These fuzzy skinned kiwis are Actinidia deliciosa. They ripen in the late fall.

Kiwis seem exotic, but they grow in many climates. They are fast growing, luscious and need plenty of room to grow on a strong support.

SITE: Full sun, and protected from the wind.

CLIMATE ZONES: All kiwis come from  eastern Asia. Fuzzy skinned kiwis can take cold down to 24 deg F. There are varieties called Arctic Beauty kiwi, that are hardy to well below zero deg. F, and the fruit is much smaller. In very hot climates you may need to protect them from the summer sun. But kiwis grow in a wide range of climates and temperature.

SEX AND THE KIWI: The kiwi vine is strong and rampant and needs a sturdy structure to hold it up.  Place the vines at least 15 ft apart.

You also need a male and female plant for pollination. Sex in the plant world is as important as the human world. When you go to the nursery to get your plants, be sure to look at the label to make sure you get a male and female.  It can take up to 5 years from planting to get fruit.  But once you do, you can get up to 200 pounds per vine.

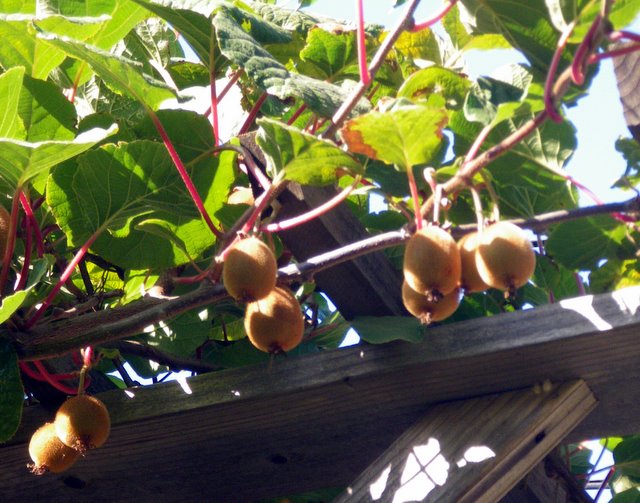
Kiwi Fruit on trellis

Kiwi vine on a strong trellis

SOIL:  The soil should be moderately rich, with good drainage. Give them plenty of compost.

WATER: They also like regular water through the season. Be sure to mulch your vines well, to keep the soil from compacting and to hold in moisture.

PLANTING: You can put in  bare root plants in winter when they are dormant  or you can put container plants in any time during mild weather.

If your garden is large enough, I recommend the kiwi for your edible landscape as a beautiful vine and a wonderfully producing fruit. It does require pruning and maintenance, but is relatively pest free.

HARVESTING: Kiwis in Northern California ripen in mid to late November.  I started harvesting my fruit mid November.  Kiwis DO NOT ripen on the vine.  They are firm to the touch when picked. Place them in a paper or plastic bag, with an apple or banana, to ripen for about a week.  Be sure to test them often. When they start to give a little, they are ripe.  Just peel it and try it.  If you have a lot of fruit, like I did this year, you can harvest them and place them in the refrigerator or other cool spot where they will stay for a few months without problem.

Bring them into the warm room in a bag to ripen as needed.


Dec 212011
 

by Avis Licht

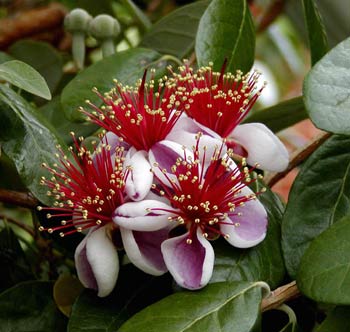
Edible blossoms from the pineapple guava

You can eat the petals from this plant. They’re good!

The Pineapple Guava is one of my favorite plants.  It serves many purposes in the edible garden. It’s an easy care, evergreen shrub that has edible flowers, edible fruits and somehow, the deer DON’T eat it.  How could you know?

Where I live, deer eat almost all our plants, so having one that does all these good things is a real treasure.

Climate:The Pineapple guava grows in Zones 8 – 10.  What this really means is that it likes some cool weather, can go down to 10 deg. F, likes rain in the 30″ – 40″ range, and doesn’t like super hot daytime weather – not so good in the desert.

Soil: It’s adaptable to a wide range of soils, including acidic soil, but prefers a humus rich soil that is well drained.  Adding compost and not manure works for this plant.

Water: This is considered a drought tolerant plant, meaning it survives with relatively little water, but needs adequate water for good fruit production. During dry spells you should give it additional water.  In real terms, this means observe your plant. In real terms, in the garden, you always need to observe your plants.  Everyone’s garden is different from the norm that all these books talk about.  You’ll always want and need to adjust requirements to your own situation.

If you need some great information on starting your Spring Garden, have a look at my new ebook, called The Spring Garden Made Easy

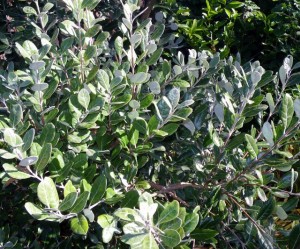
the leaves of the Pineapple Guava are neat and compact.

You can prune it, you can eat it, you can watch the hummingbirds feed on the flowers

Sun: Full sun is best – but it can tolerate partial shade

Wind:The Pineapple guava makes a good windbreak. It can take some salt air, but I wouldn’t put it on the dunes as a first line wind break.

Care:  What I really love about this plant is that it needs so little care.  It just grows happily on its own. You can prune it for shape or let it alone. If you prune it back hard, you will lose some fruit production.

Pests: Almost none. Well, I haven’t seen any.

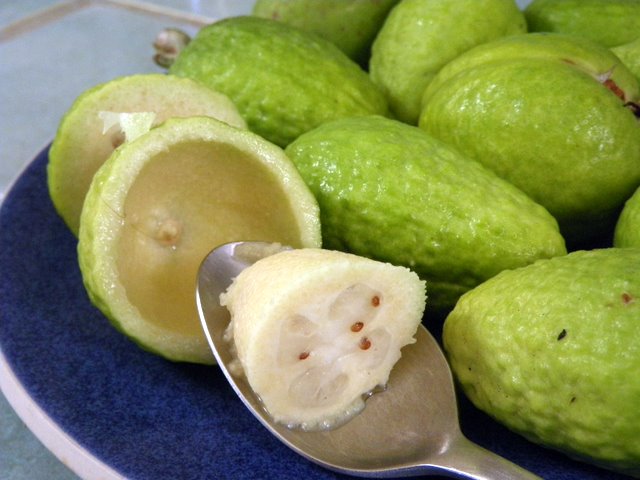
Fruit and flowers:  The flowers which bloom late Spring are edible. The thick petals are spicy and are eaten fresh. The petals may be plucked without interfering with fruit set. The fruit ripens in late Fall, which is a great boon, since almost everything else in the garden is gone.  The fruit in the picture below, came from my garden on December 22 after many days of frost. They taste fresh and tangy. We eat them by scooping out the fruit with a spoon.  Or you can  cook them in puddings, pastry fillings, fritters, dumplings, fruit-sponge-cake, pies or tarts.

Be sure to check out my store for great tools and garden implements.

Scoop the fruit of the pineapple guava

Cut the fruit in half and scoop it out with a spoon. Really tasty.

If you live in the right climate, I really think you ought to try growing the Pineapple Guava. It’s a giving and a forgiving plant for your edible landscape.

If you want to know a lot more about gardening I have lots of posts on my blog and a new e book called The Spring Garden Made Easy. For $4.99 it’s the deal of the century. Check it out here: https://www.ediblelandscapingmadeeasy.com/publications/.

Spring Garden Made Easy

[portfolio_slideshow id=1000].


Dec 192011
 
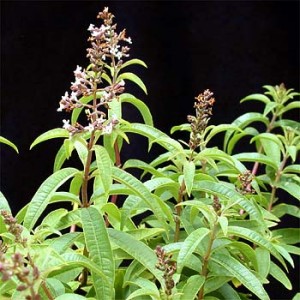
Lemon Verbena in flower

by Avis Licht

Lemon Verbena in flower

One of the best herbs for tea and flavoring - lemon verbena

Growing your own herbs for tea and flavorings is easy and satisfying. Many herbs can be grown in pots and brought inside in the winter, to give you fresh, delicious taste. In the next series of posts I’ll go through a variety of my favorite herbs.  Today’s is about Lemon Verbena.

This delicate perennial can survive winters down to 20 deg F, but will lose its leaves in the the winter.  In mild winter areas, it may keep some of its leaves.  So if you have a place in your house for this plant, it is worth the space. We don’t always have lemons available, but you can have lemon flavoring with this plant.  It is tangy and lemony in a way you wouldn’t think a leaf could be.

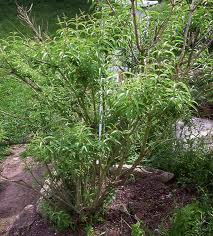
In the ground, lemon verbena can grow to 8 – 10 feet. It looks better pruned, but is still kind of homely.  However, its flavor more than makes up for any  visual deficiencies.

Lemon verbena prefers  rich, well drained soil. It does better with regular watering, but can become fairly drought resistant with time. Full sun is the best.

In a container, make sure it has compost and well draining potting soil.  Water it regularly, but don’t leave it sitting in water. Put it in a sunny spot by a window.

Lemon verbena grown in the ground

Incredible lemon fragrance makes lemon verbena a favorite shrub

You can use the leaf as a substitute for lemon zest in almost any recipe. It is fine in both sweet and savory dishes. You can use the leaves to garnish fruit salad, or put it in with vegetables such as as broccoli, spinach or asparagus.  You can rub chicken or lamb with the leaf or lay it over fish while baking.

Pour boiling water over the leaves and you have a wonderful tea, or float a few leaves in cold water and have the fresh taste of lemon.

Its uses are really numerous.  Experiment – you can’t go wrong with this plant in your edible landscape.


© 2011-2024 Edible Landscaping Made Easy With Avis Licht All Rights Reserved